Record your first video
Open TinyRec, pick a screen, hit record, and end up with a finished MP4 — in five minutes.
Step 1 — Pick “Quick recording”
Open TinyRec. The home screen shows two big cards. Click Quick recording (the lightning-bolt one). This is the right pick when you just want to capture something now without planning out scenes.
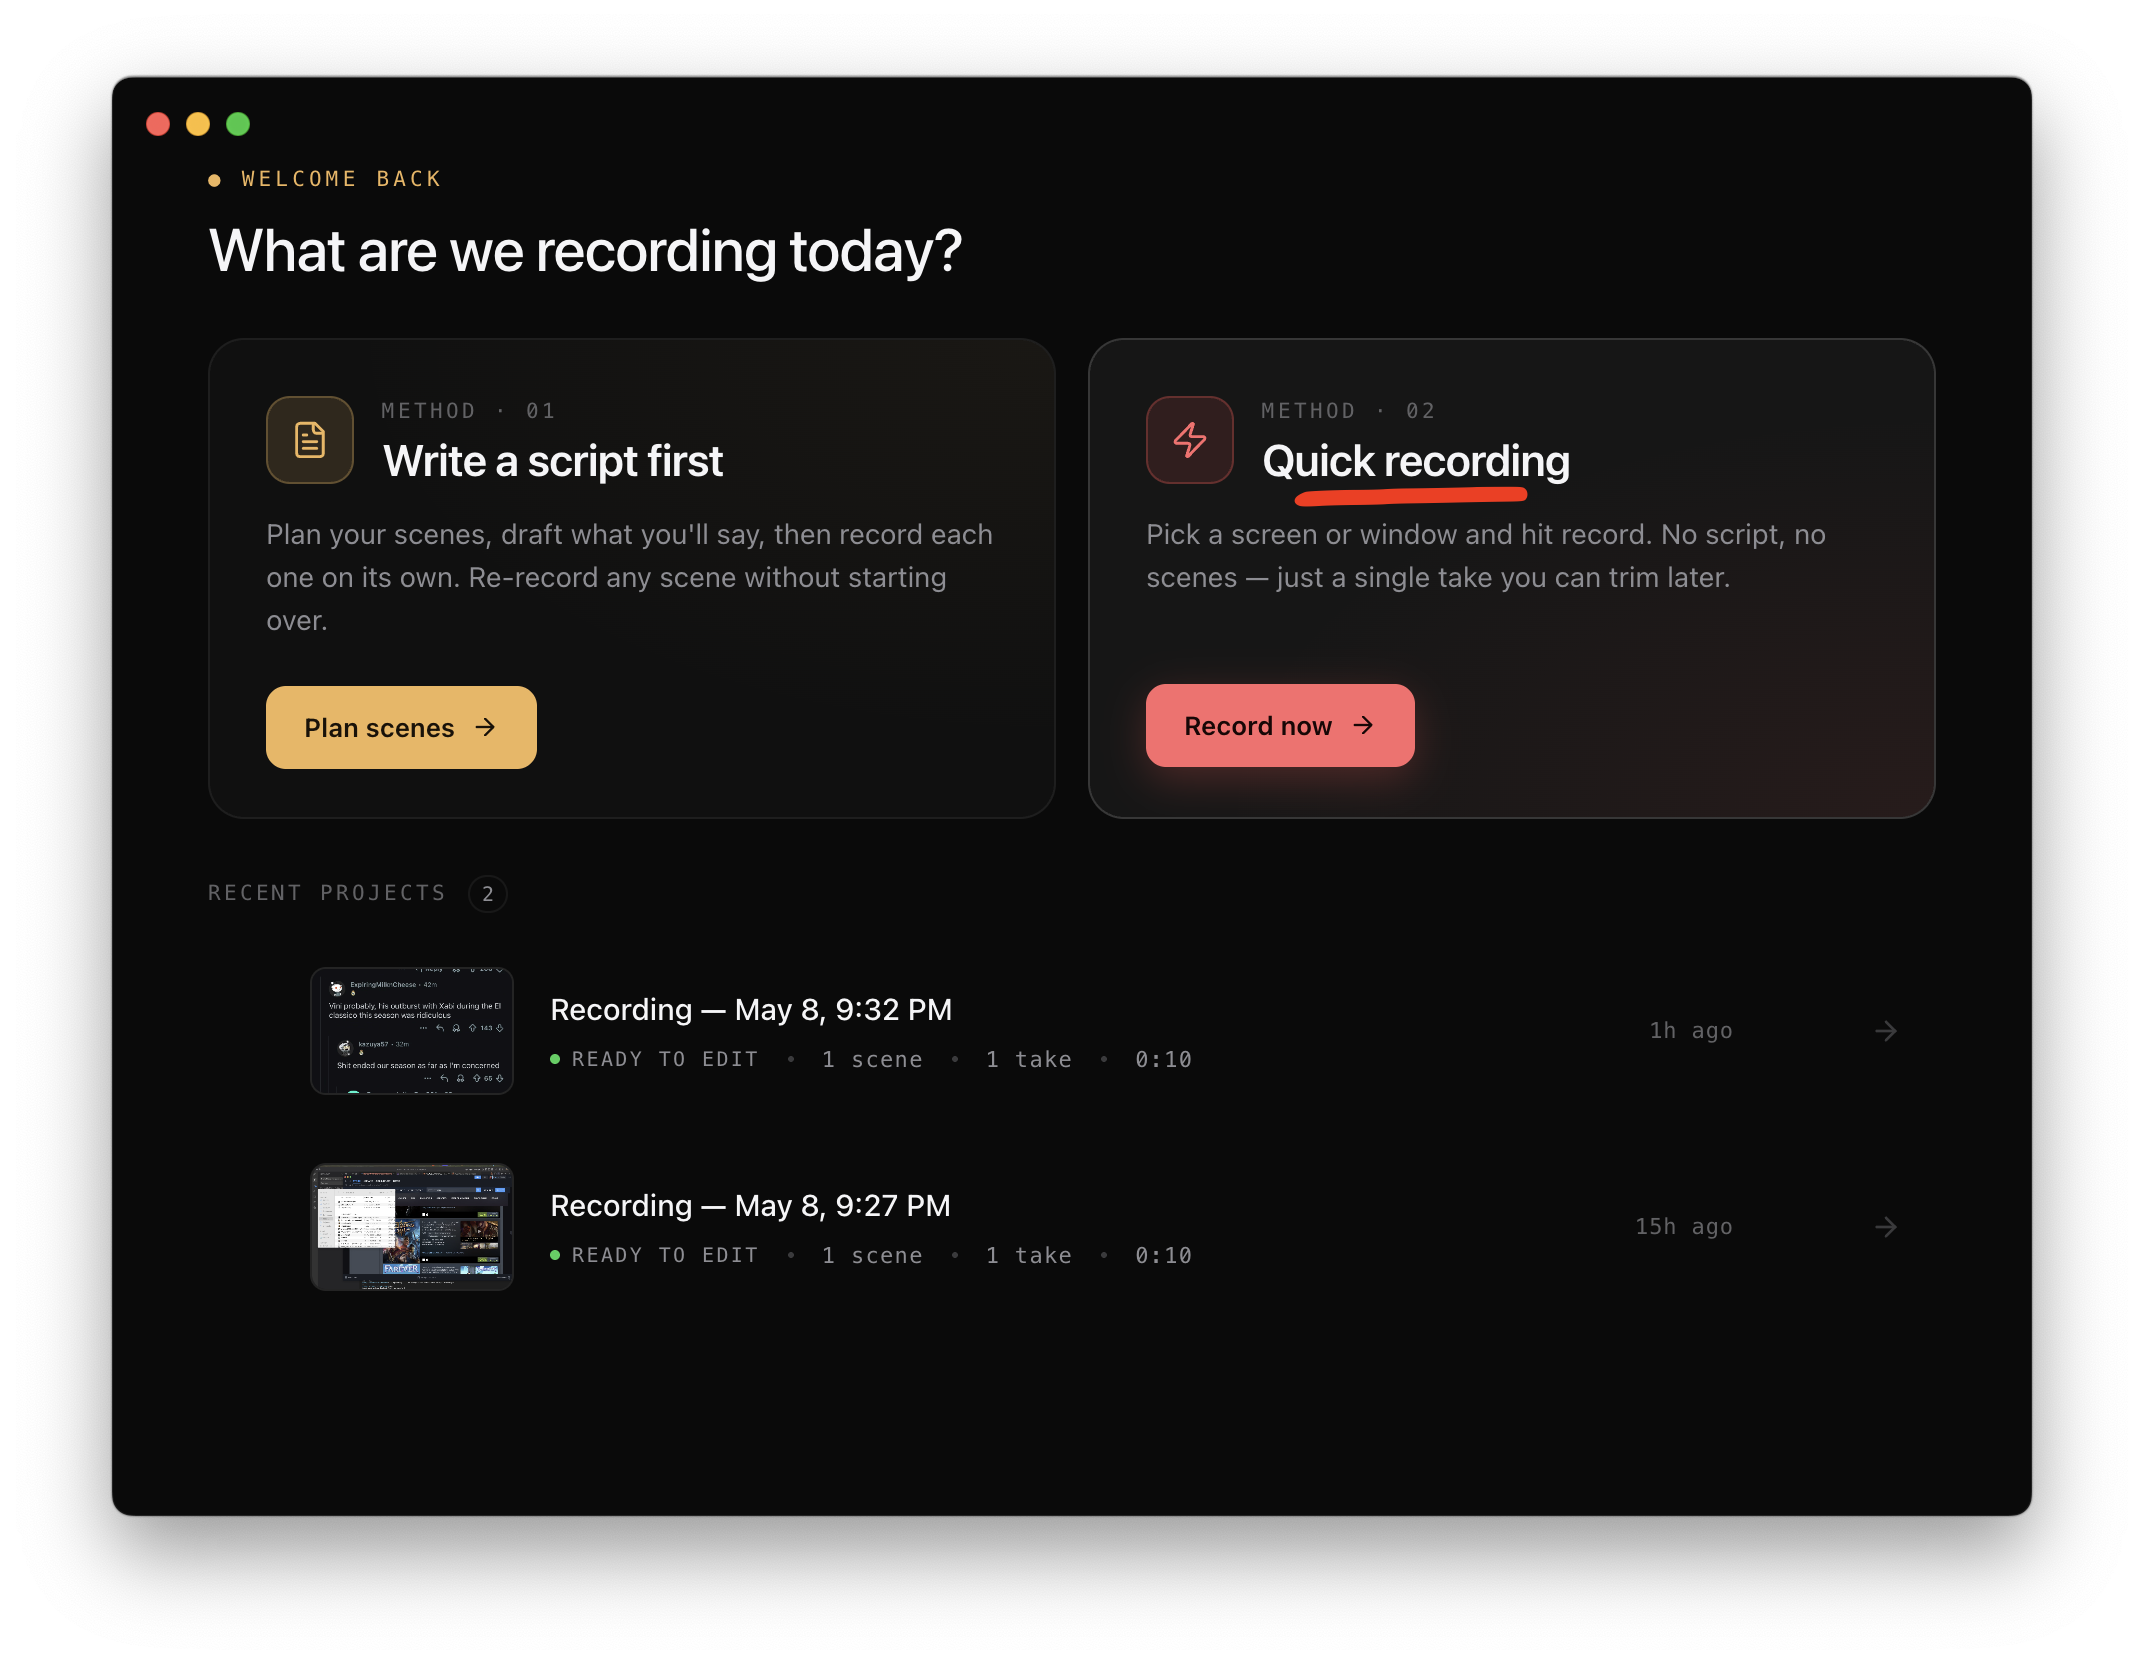
Coming back later? Use Write a script first when you have a multi-scene tutorial planned out. We’ll cover that in a separate guide.
Step 2 — Pick what to capture
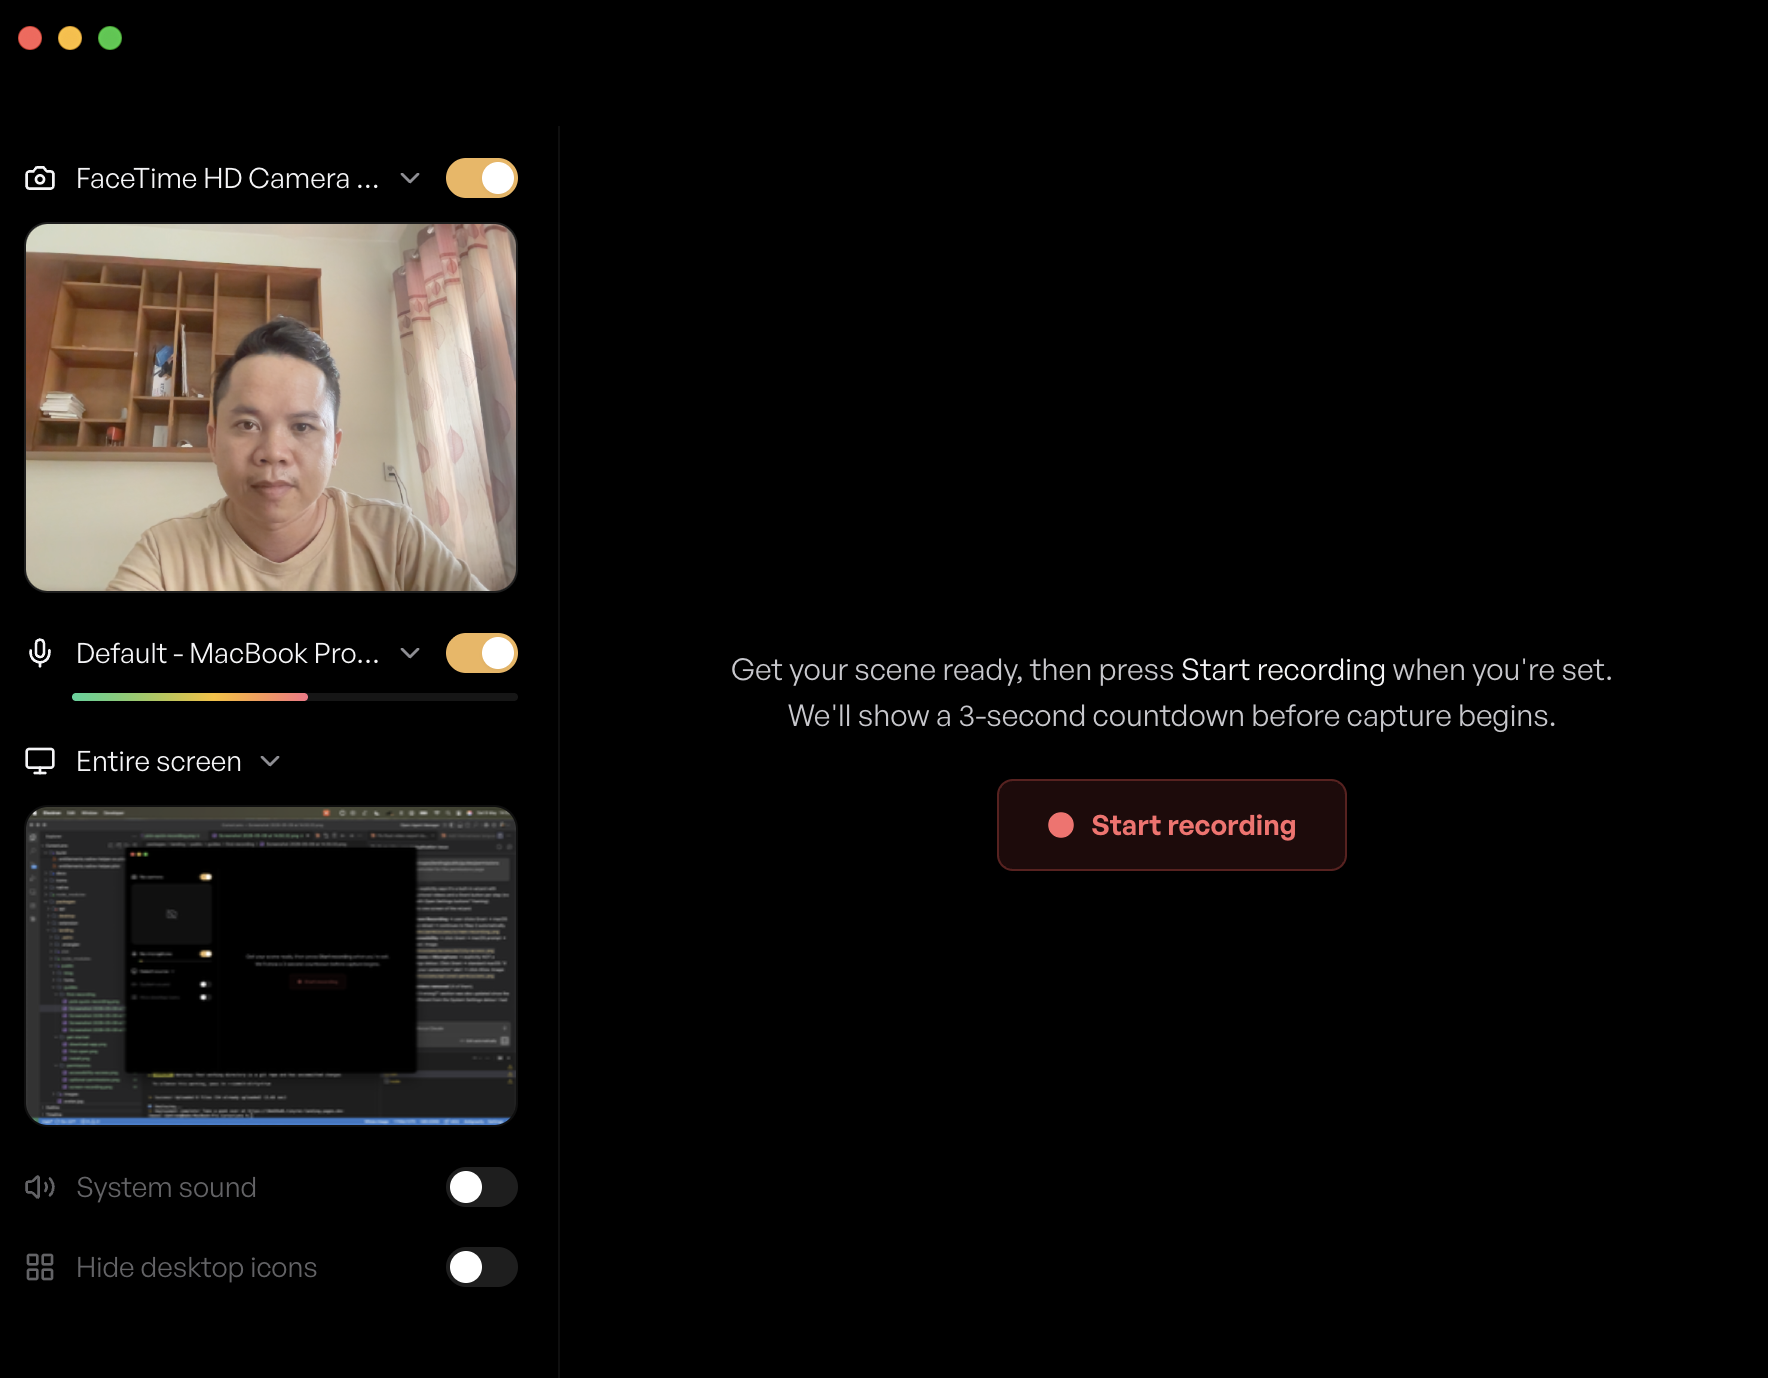
You land on the recording dashboard. On the left you’ll see toggles for camera, microphone, and system sound. Below that there’s a Source row — click it to pick what TinyRec records.
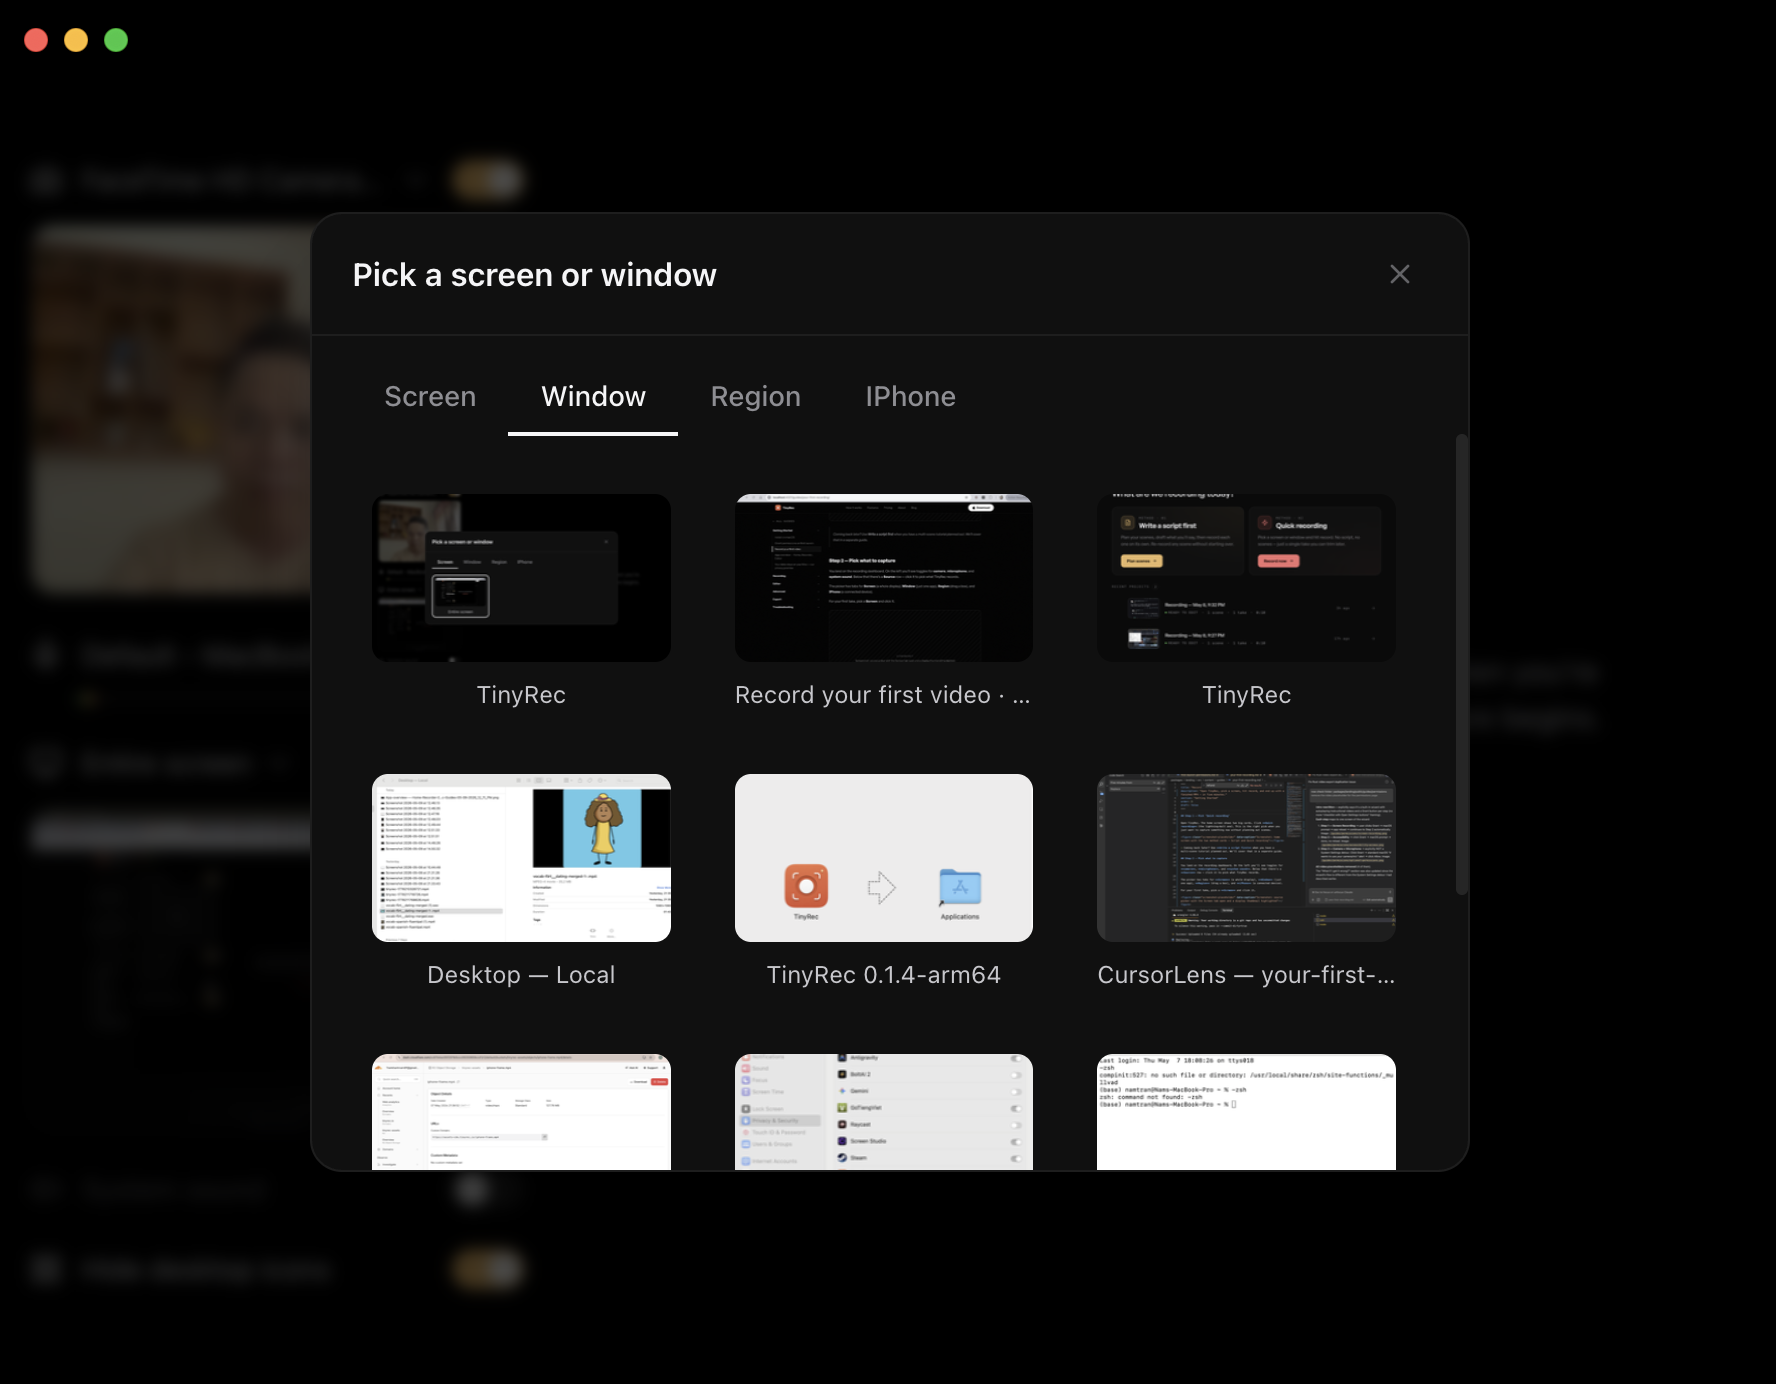
The picker has tabs for Screen (a whole display), Window (just one app), Region (drag a box), and iPhone (a connected device).
For your first take, pick a Screen and click it.
Toggle the mic on if you want to talk, off if you don’t. Toggle the camera on if you want a face overlay in the corner.
Step 3 — Hit record
Click the big red Start Recording button. You’ll see a 3-2-1 countdown overlay, then the recording starts. A small floating indicator appears in the corner showing the elapsed time and a Stop button.

The recording indicator doesn’t appear in your final video. It’s a TinyRec UI element drawn on top of your screen for you — the captured frames silently exclude it. Same for the menu bar icon and the countdown overlay. Whatever you see in the editor preview is what your viewers will see.
Do whatever it is you want to record. Move the mouse around. Click some buttons. When you’re done, click the Stop button on the indicator (or use the menu bar icon).
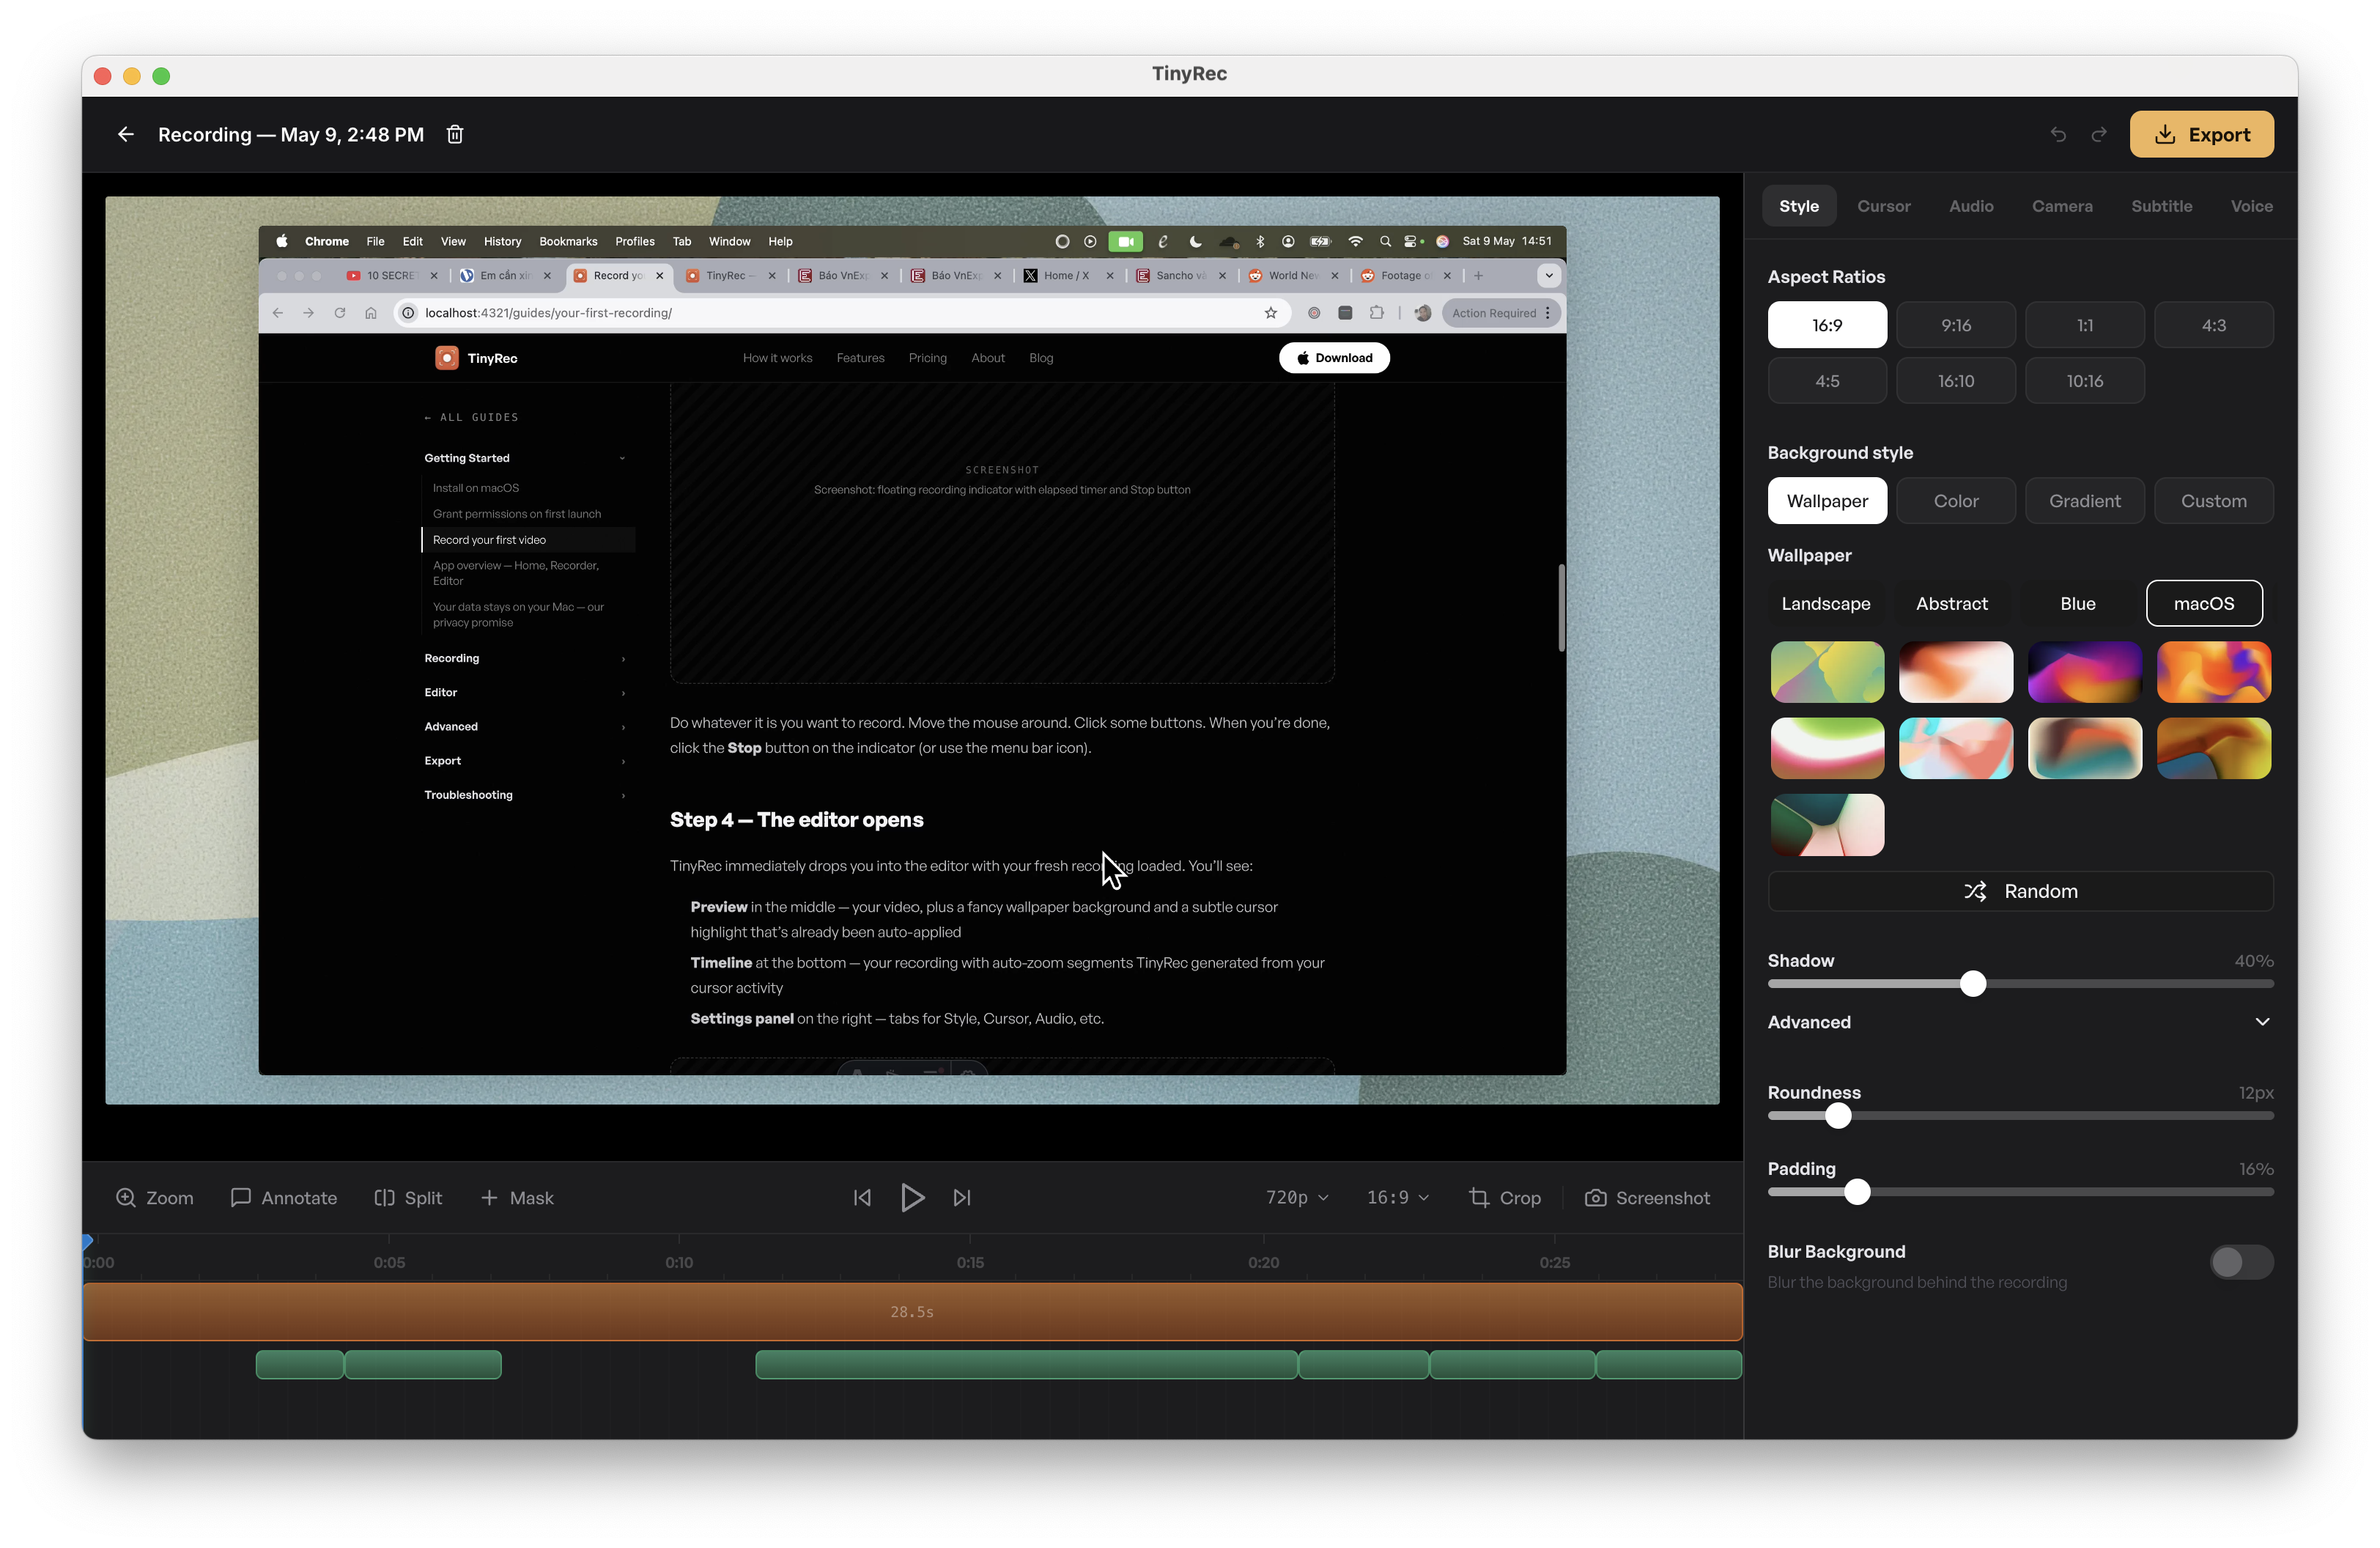
Step 4 — The editor opens
TinyRec immediately drops you into the editor with your fresh recording loaded. You’ll see:
- Preview in the middle — your video, plus a fancy wallpaper background and a subtle cursor highlight that’s already been auto-applied
- Timeline at the bottom — your recording with auto-zoom segments TinyRec generated from your cursor activity
- Settings panel on the right — tabs for Style, Cursor, Audio, etc.
You can hit space to play it back. The auto-zoom segments will zoom into wherever your cursor was active. If you don’t like one, click it on the timeline and press Delete.
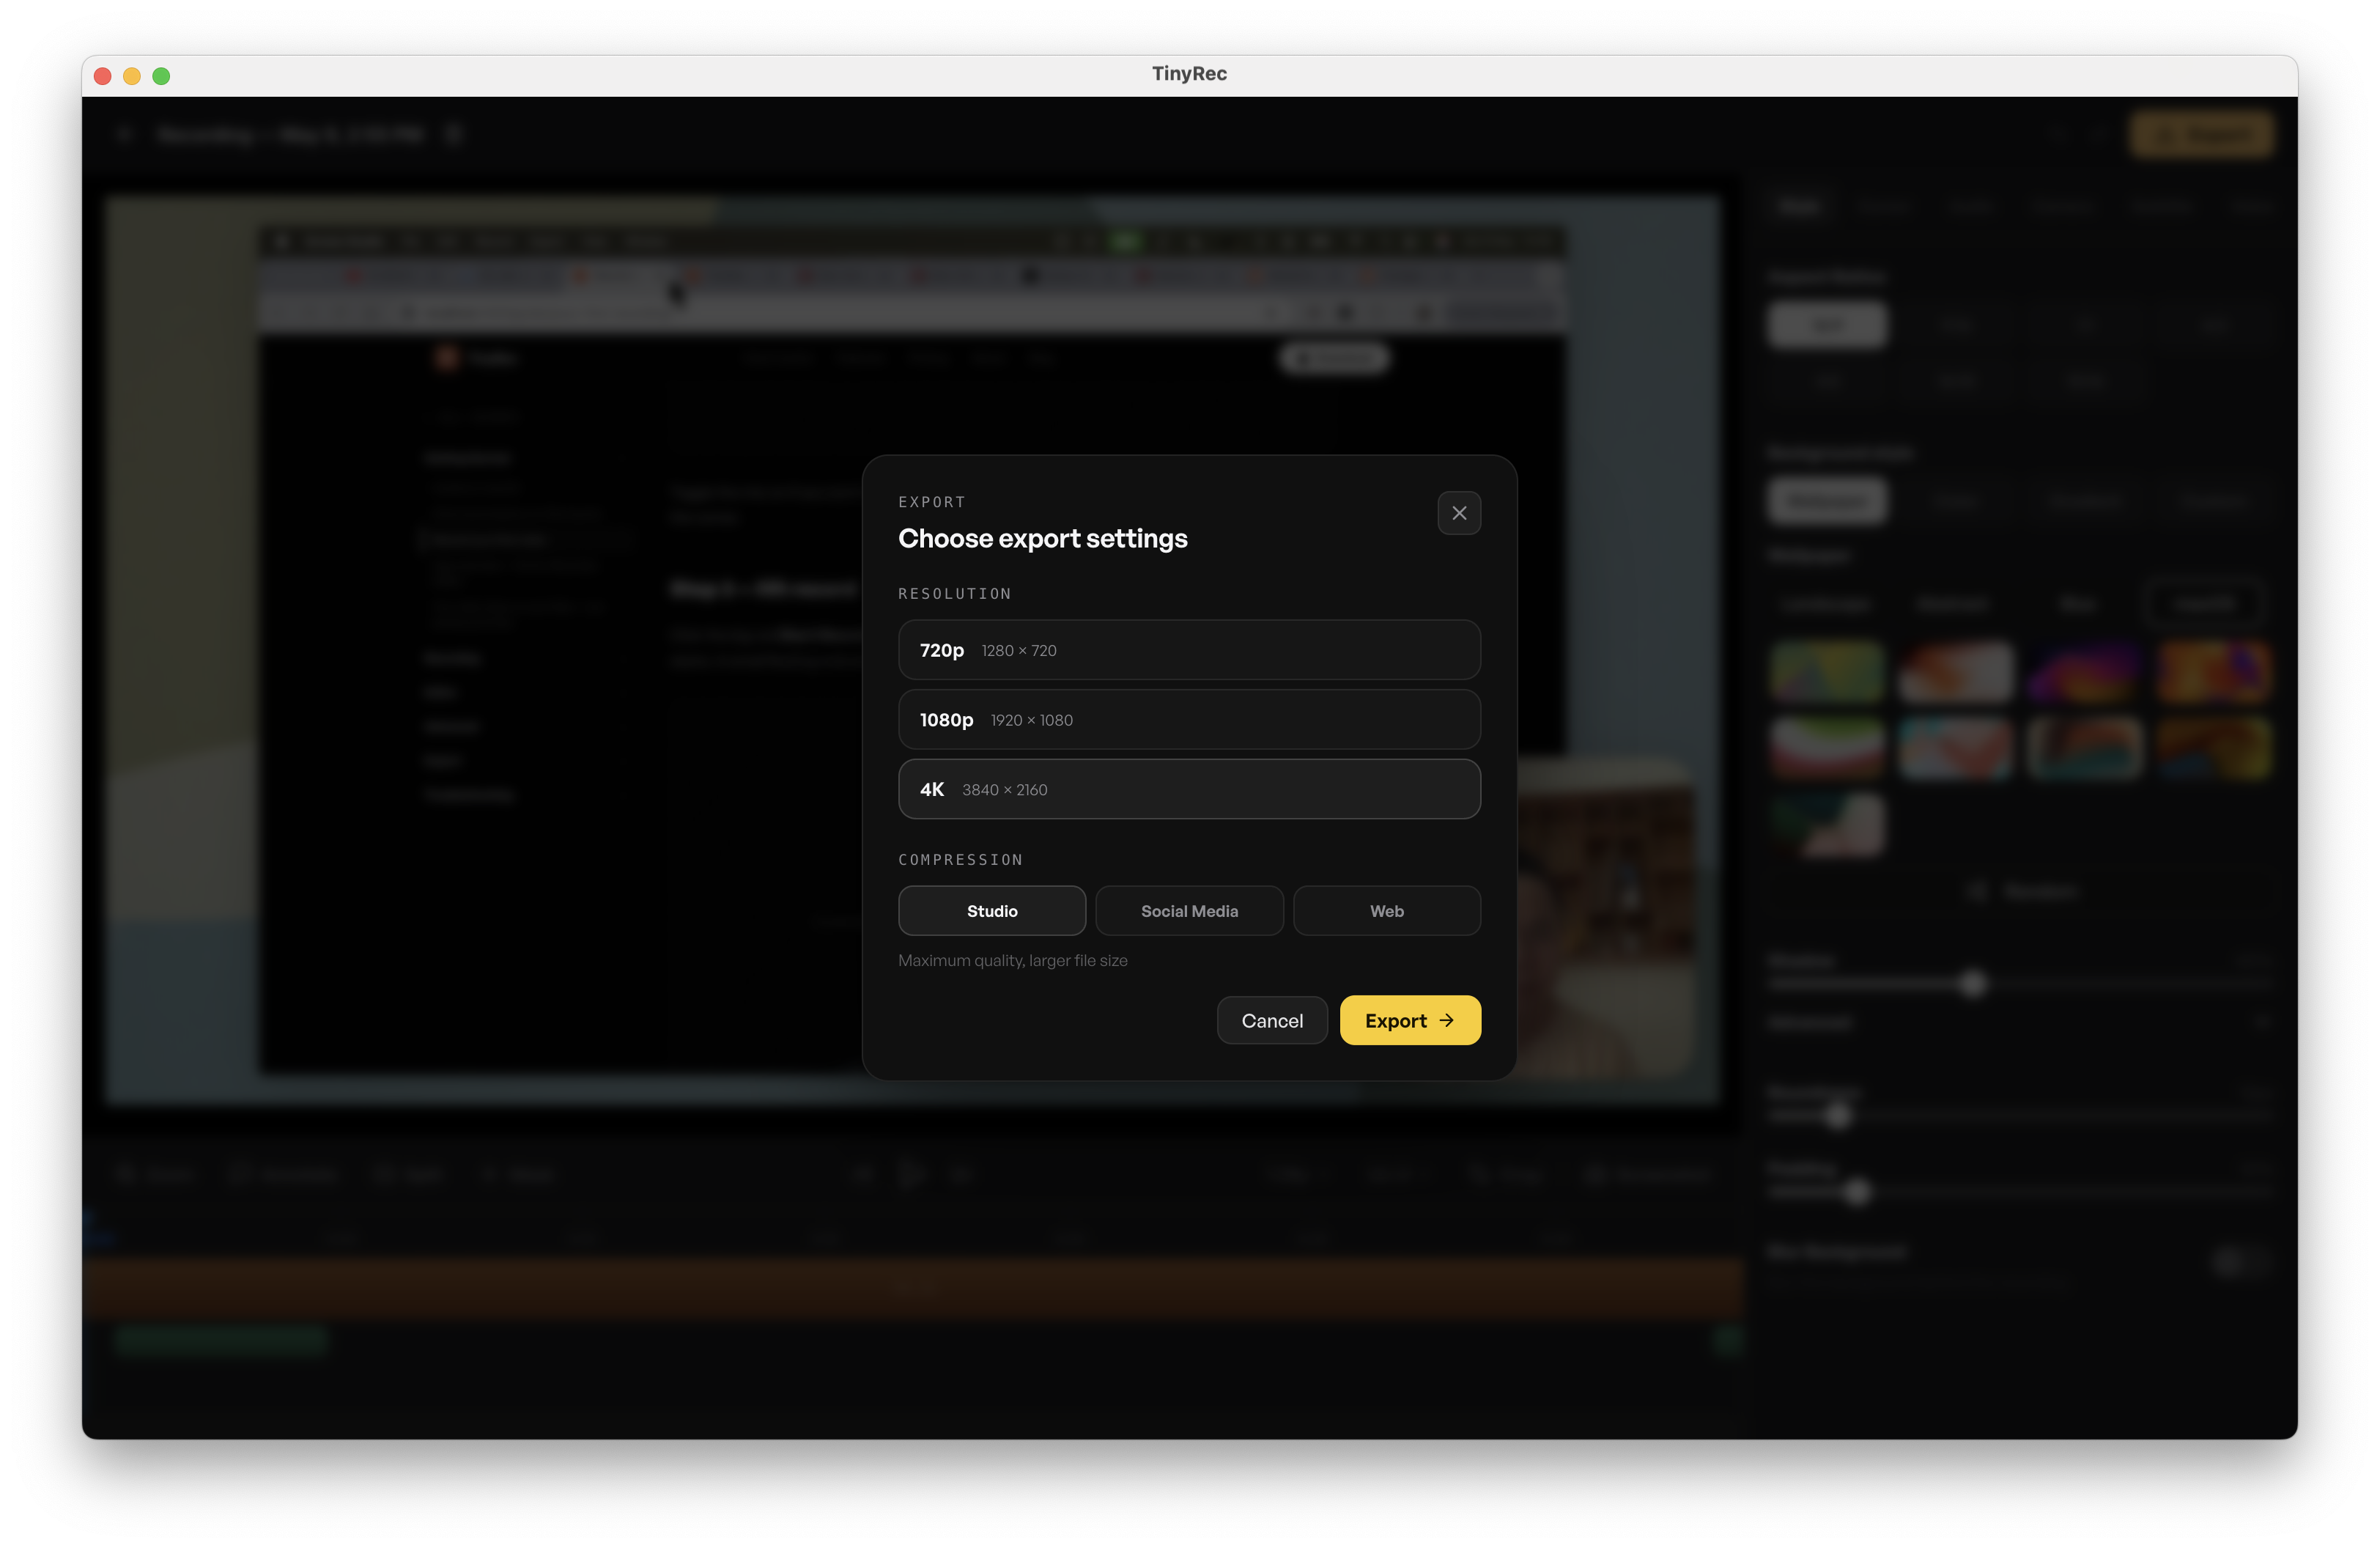
Step 5 — Export to MP4
When you’re happy, click Export in the top-right. Pick a folder, give the file a name, and let it run. A 30-second 1080p clip exports in a few seconds; longer clips scale linearly.
That’s it. You have an MP4. Drop it into a tweet, a Slack message, or a YouTube upload.
Next time: try writing a script
Quick recording is great for one-shot clips, but for anything longer than a minute or with multiple sections, the script flow gives you a teleprompter and per-scene retakes — so you don’t fluff a 5-minute take and start over.
→ Write a script with multiple scenes
What’s next
Now that you’ve seen the whole loop, the rest of the editor will make a lot more sense. Take the tour:
→ App overview — Home, Recorder, Editor
Or jump straight to a specific feature: