Customize your recording
Set up a take in the recording dashboard — pick your source, dial in the mic and camera, and stop cleanly. The full reference for everything before you hit record.
This page is the reference for everything in the recording dashboard — the screen you land on after picking Quick recording or starting a script project. If you haven’t done a take yet, Record your first video walks through the happy path; come back here when you want detail on a specific knob.
The recording dashboard
Three things live in this view: device toggles, the source picker, and the big red Start Recording button.
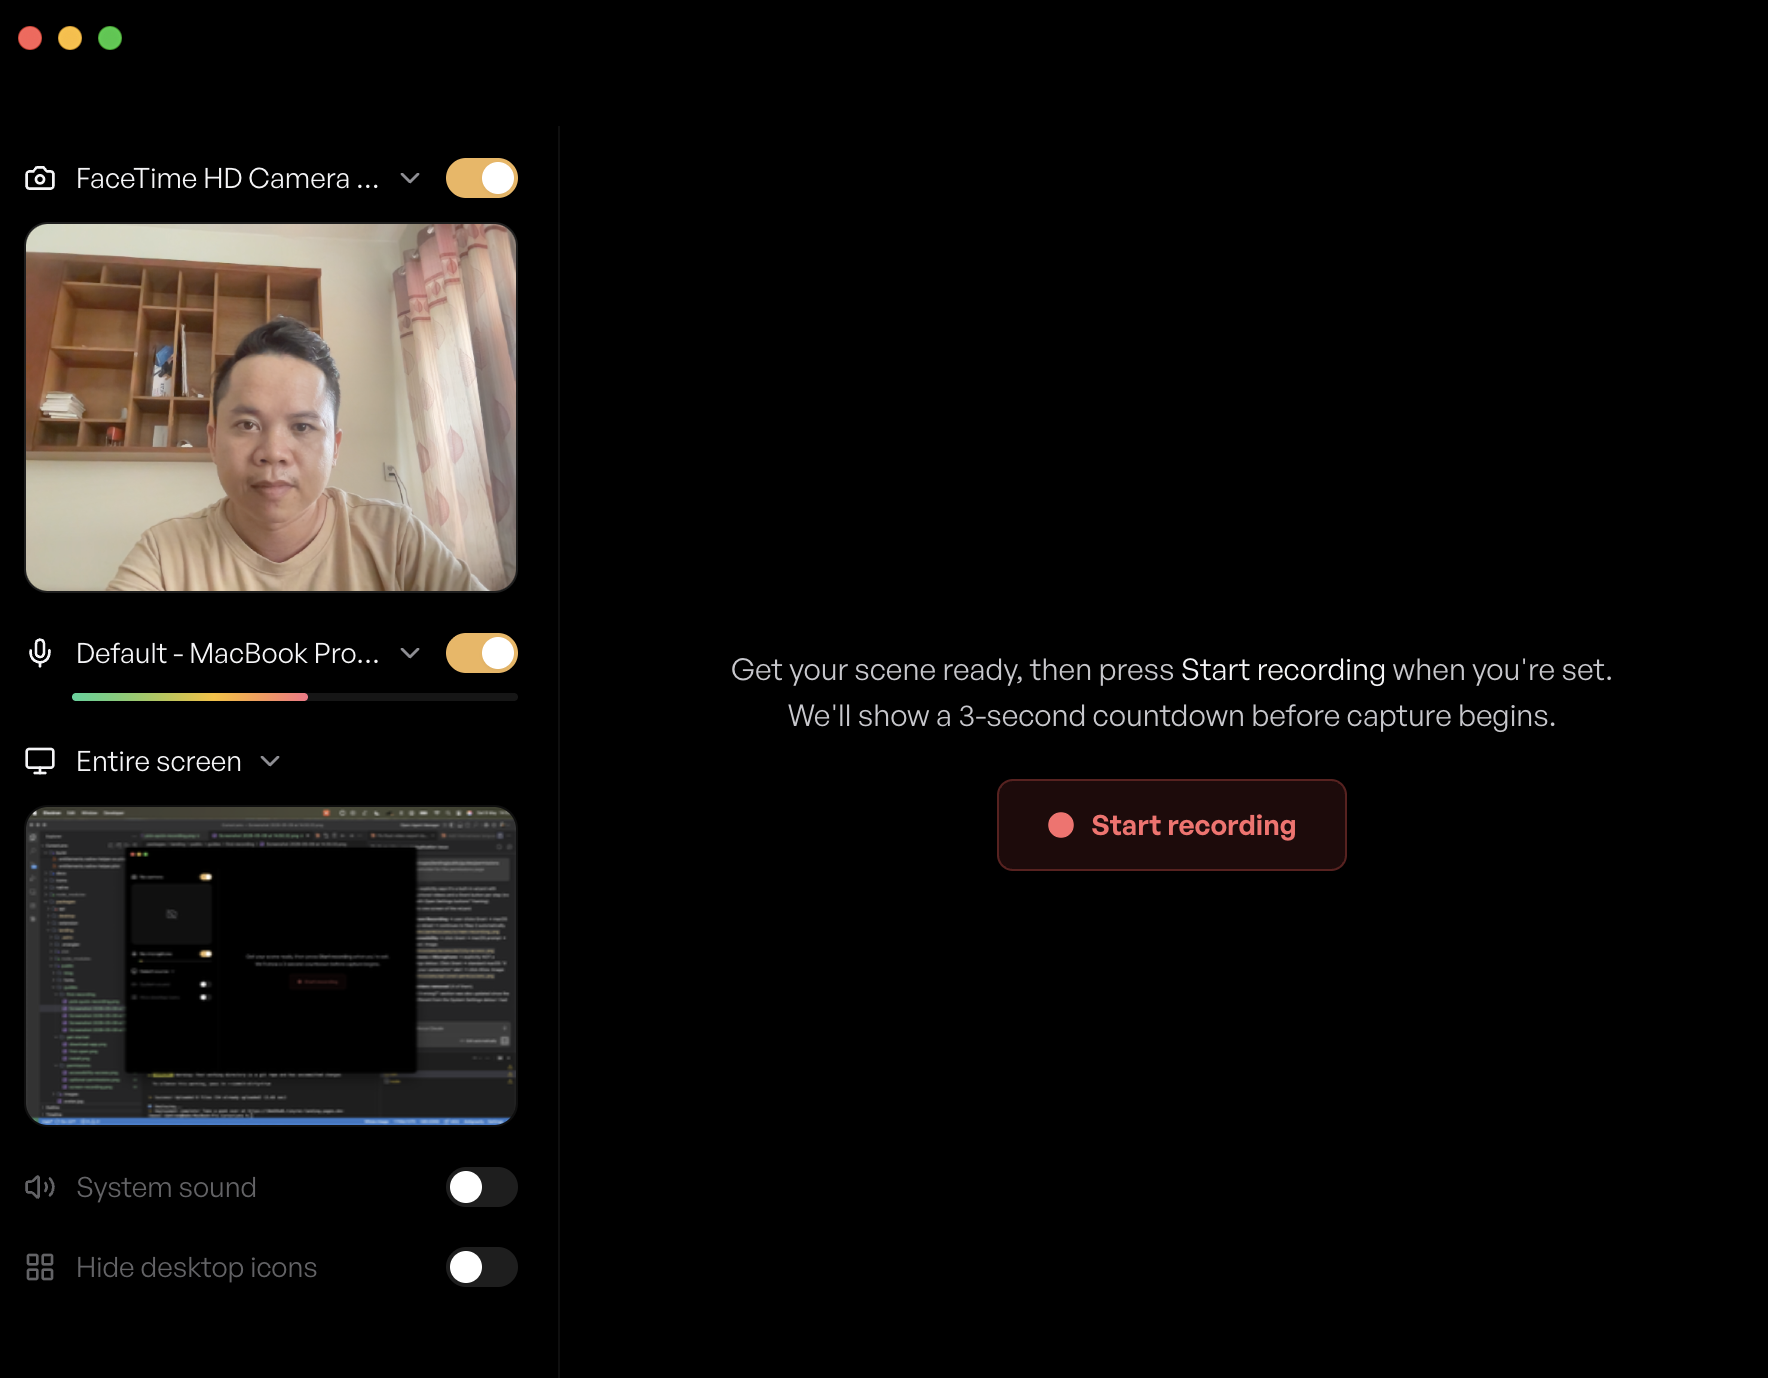
- Camera, microphone, system sound — three toggles in the left panel. Flip them on or off independently. Each one shows a live preview (camera feed, mic level meter) so you can confirm the right device is selected before you record.
- Source — what TinyRec actually captures. Click the row to open the picker.
- Start Recording — the red button. Click it, get a 3-2-1 countdown overlay, then capture begins.
Source types
The picker has four tabs. Pick whichever fits the take.
Screen — capture an entire display
Best for: full-app workflows where you switch windows, multi-app demos, anything that needs the full canvas.
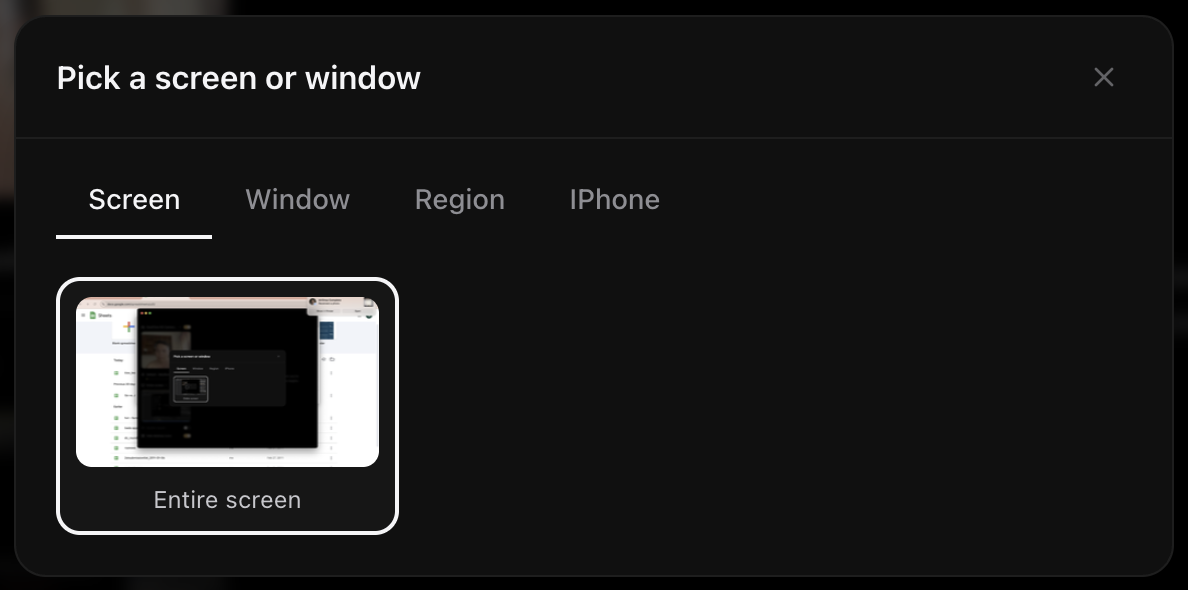
Pick a display from the thumbnails (multi-monitor setups show one thumbnail per screen). The whole display is captured at its native resolution. If you have a cluttered desktop, toggle Hide desktop icons before you start — TinyRec hides them just for the duration of the recording.
Window — capture a single app window
Best for: app demos, tutorials, anything where you want to crop out the rest of your screen automatically.
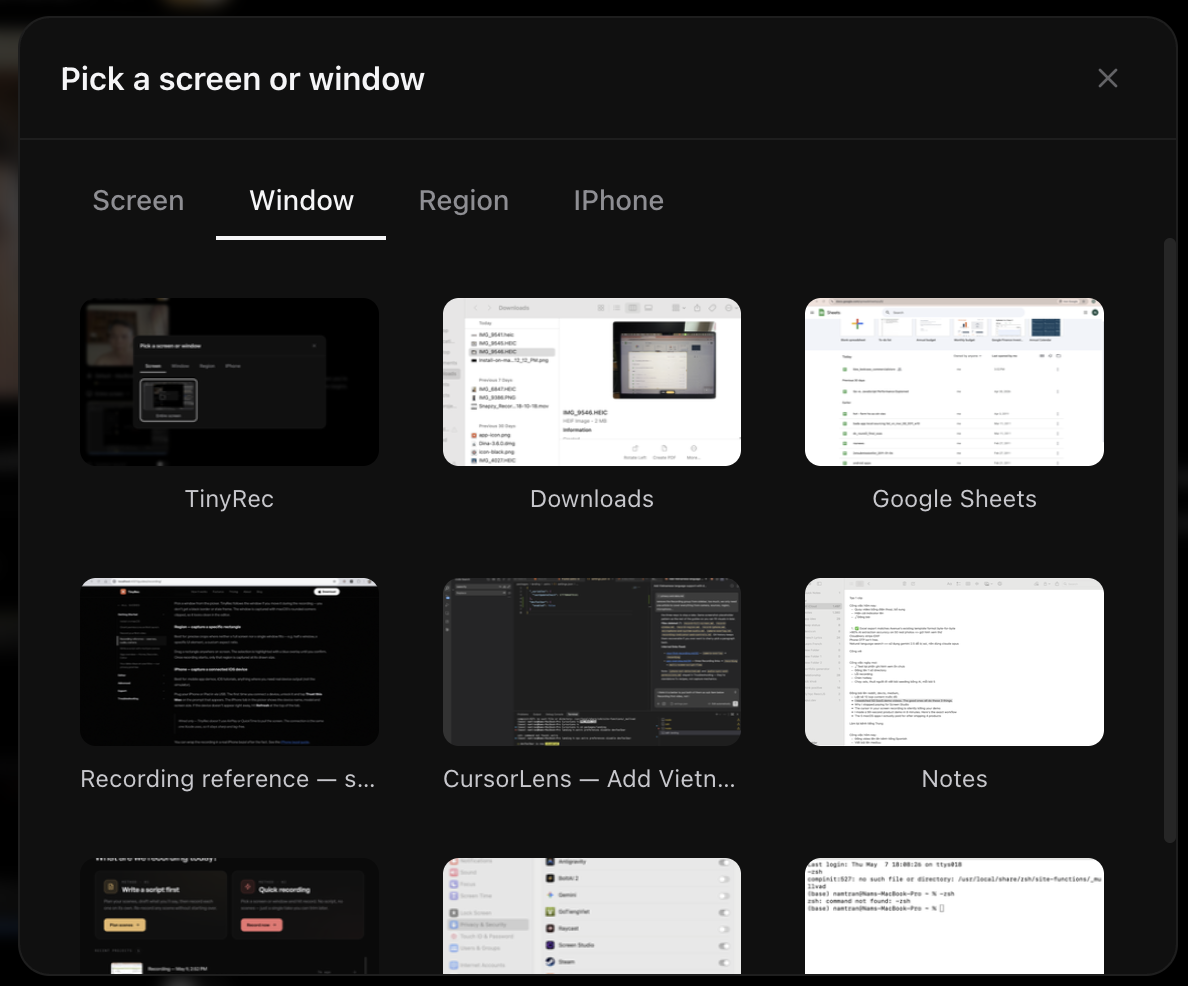
Pick a window from the picker. TinyRec follows the window if you move it during the recording — you don’t get a black border or stale frame. The window is captured with macOS’s rounded corners clipped, so it looks clean in the editor.
Region — capture a specific rectangle
Best for: precise crops where neither a full screen nor a single window fits — e.g. half a window, a specific UI element, a custom aspect ratio.
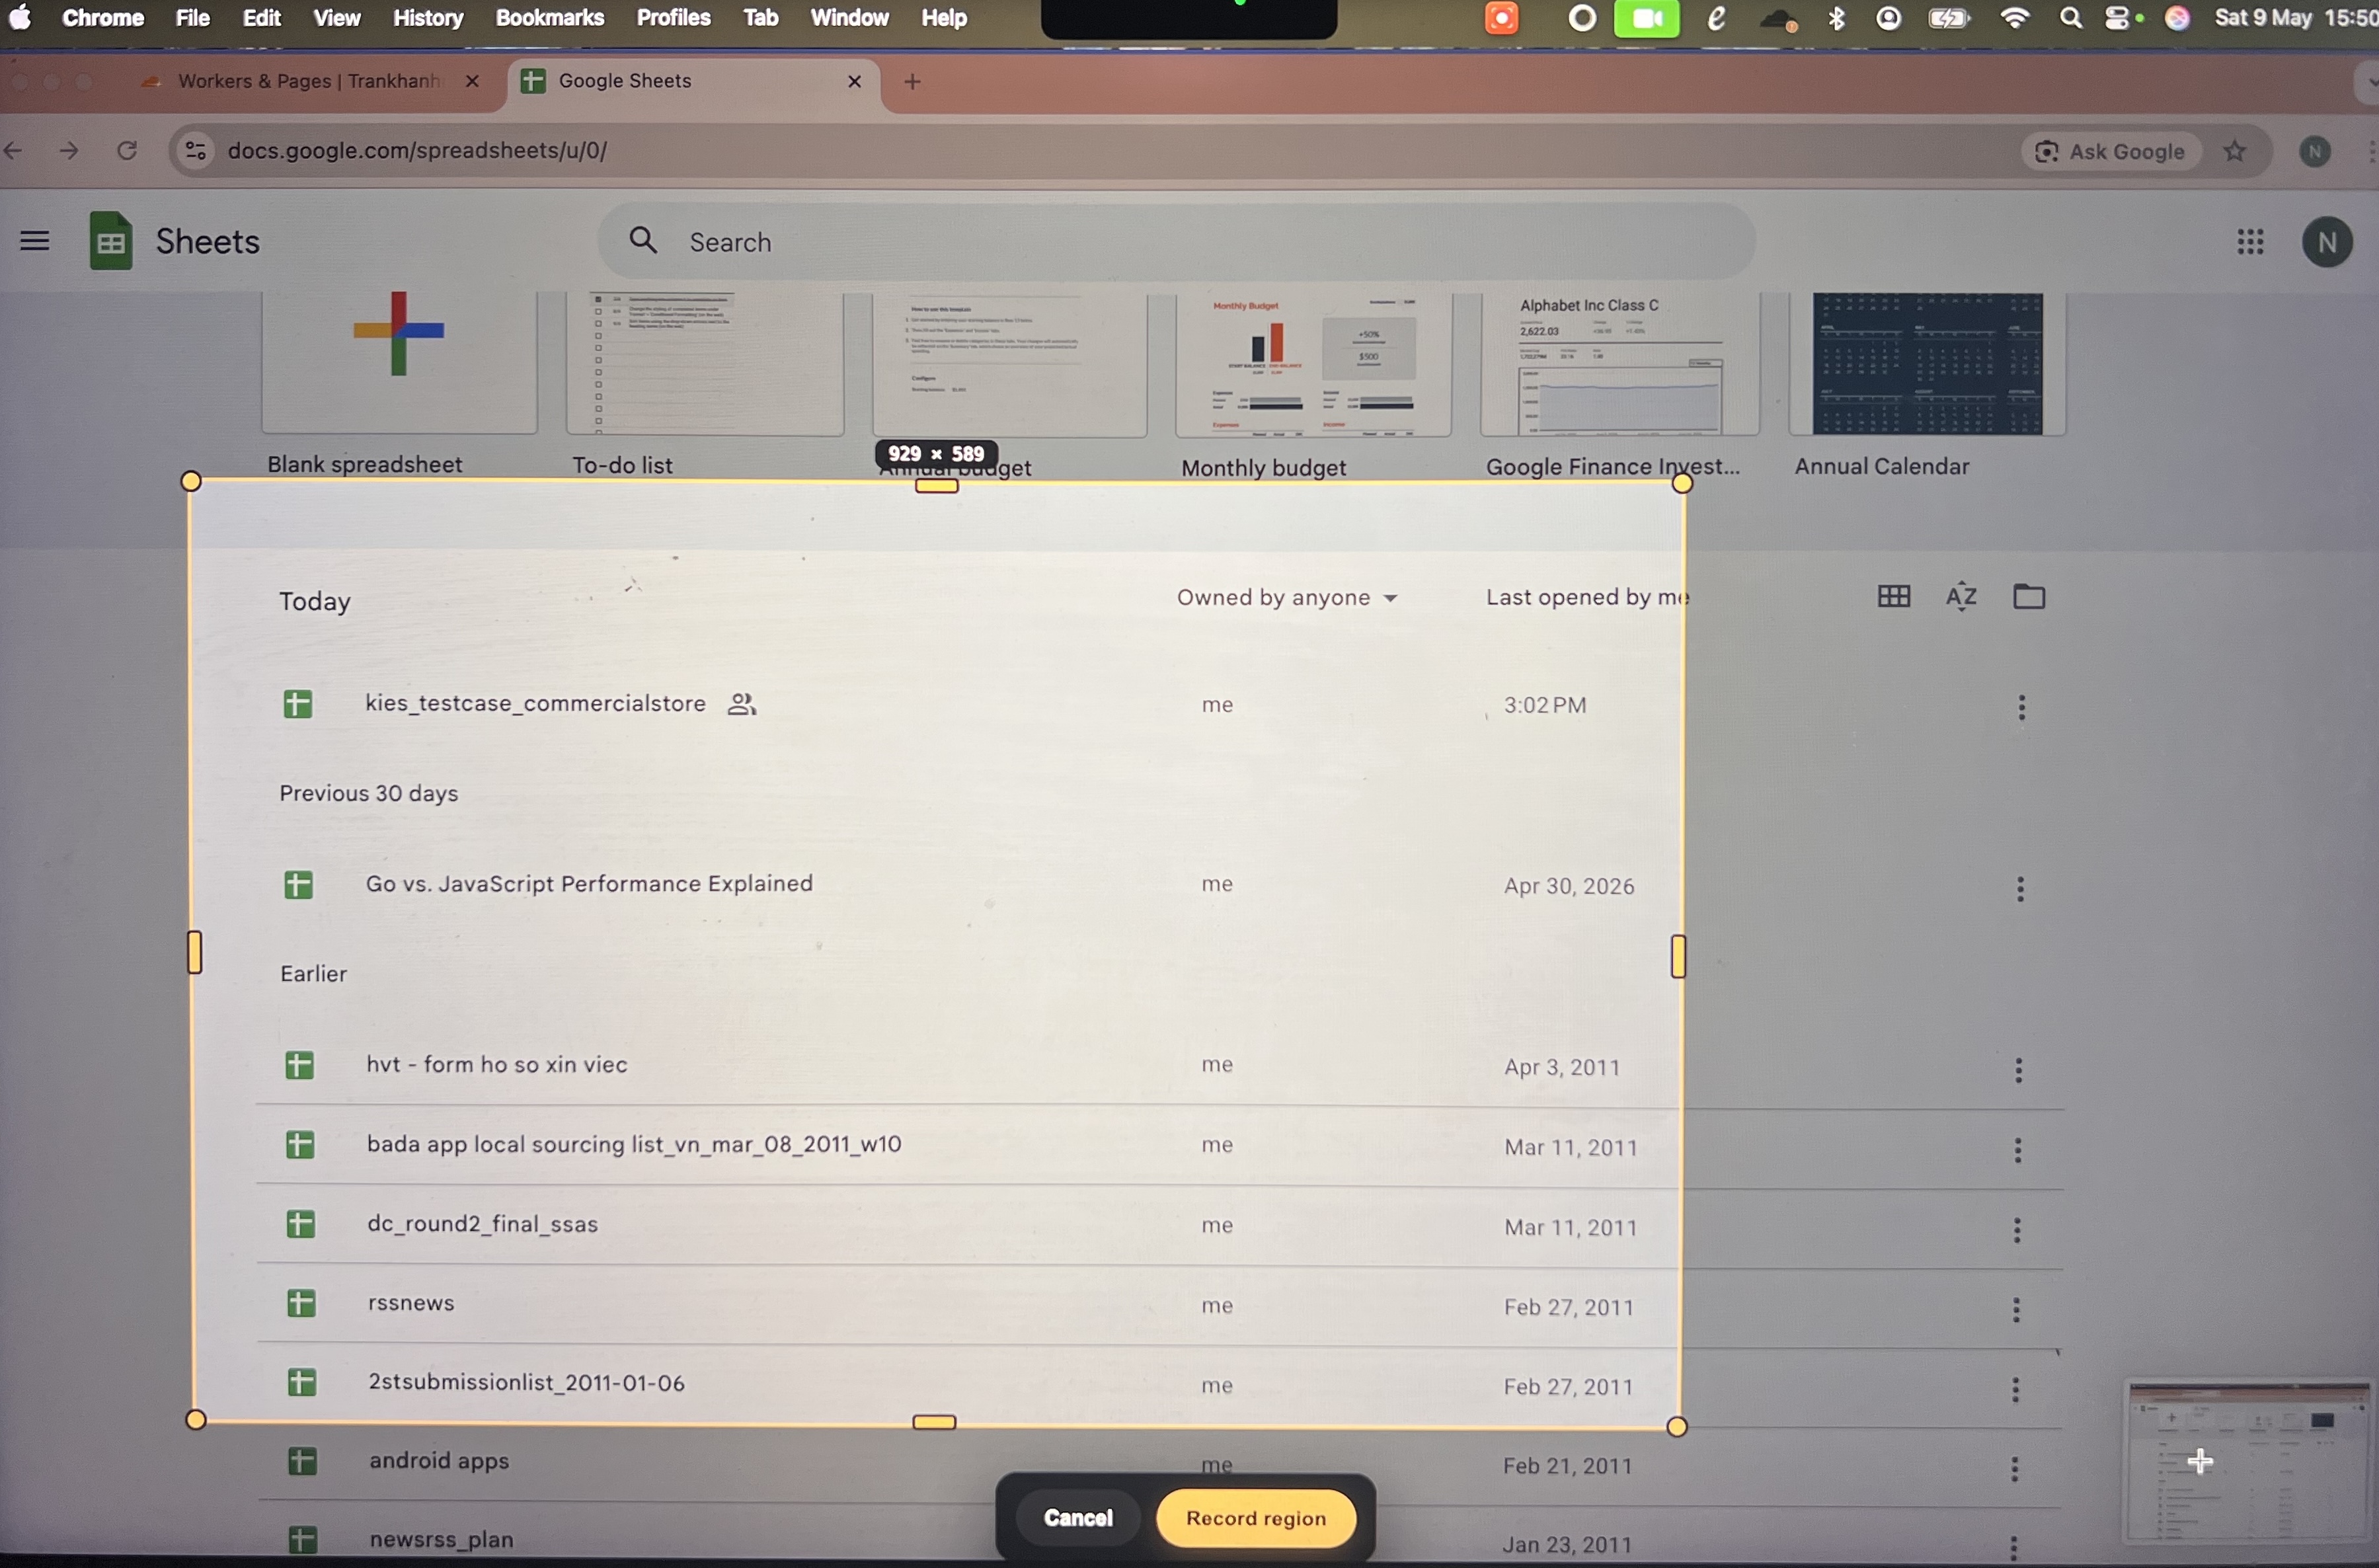
Drag a rectangle anywhere on screen. The selection is highlighted with a blue overlay until you confirm. Once recording starts, only that region is captured at its drawn size.
iPhone — capture a connected iOS device
Best for: mobile app demos, iOS tutorials, anything where you need real device output (not the simulator).
Plug your iPhone or iPad in via USB. The first time you connect a device, unlock it and tap Trust this Mac on the prompt that appears. The iPhone tab in the picker shows the device name, model and screen size. If the device doesn’t appear right away, hit Refresh at the top of the tab — and if it still doesn’t show up, see iPhone not detected.
Wired only — TinyRec doesn’t use AirPlay or QuickTime to pull the screen. The connection is the same one Xcode uses, so it stays sharp and lag-free.
You can wrap the recording in a real iPhone bezel after the fact. See the iPhone bezel guide.
Audio
Two independent audio toggles in the left panel. You can use both, either, or neither.
Microphone
Pick a mic from the dropdown — built-in, USB headset, AirPods, anything macOS sees. The level meter under the dropdown moves while you talk so you can confirm the right device is active before you start.
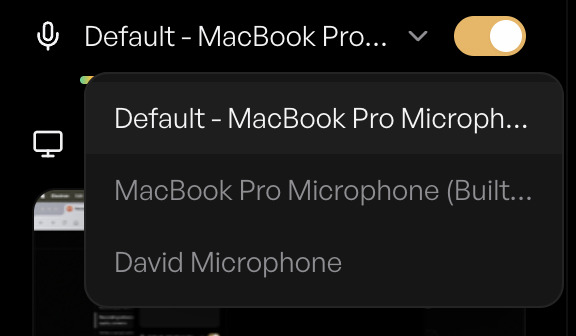
The mic gain is captured raw. If a take comes in too quiet or too loud, you can fix it in the editor’s Audio tab without re-recording.
System audio
Toggle this on to record what’s playing through your speakers — useful for capturing app sounds, music, video calls. macOS asks for the System Audio permission the first time you turn this on; grant it once and it remembers.
System audio and the microphone are recorded as separate tracks. In the editor you can mute one independently of the other or rebalance their levels.
Camera overlay
Toggle the camera on if you want a face cam in the corner.
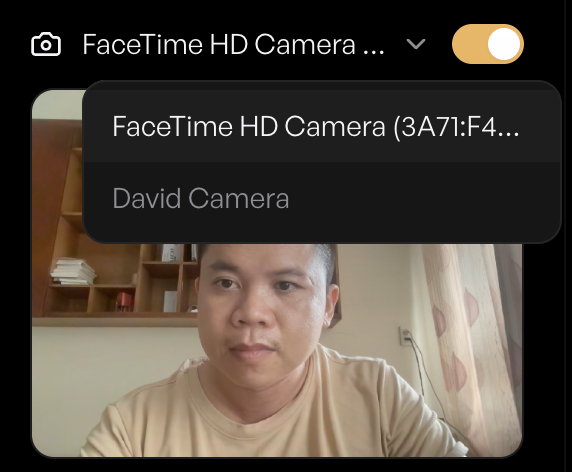
The dropdown lists every camera macOS sees — built-in FaceTime camera, external webcams, Continuity Camera (your iPhone as a webcam). The live preview shows you what you’ll look like. macOS asks for Camera permission the first time, same as the mic.
The camera is recorded as a separate track. That means in the editor you can:
- Resize and move the camera bubble after the fact
- Change its shape (circle, rounded square, full-frame)
- Hide it on the parts of the video that don’t need a face on screen
- Animate fullscreen-to-corner intros
Nothing about the camera is baked into the recording. If you change your mind in the editor, you change your mind — no re-record.
Starting and stopping a take
Countdown
Hit Start Recording. You get a 3-2-1 overlay before capture begins, so you can move your cursor where you want it before the timer rolls.
Recording indicator
Once you’re recording, a small floating bar appears in the corner of the captured display. It shows:
- The elapsed timer
- A Stop button
- A Pause button (the pause is in the recording, not the indicator — useful if you need to switch contexts mid-take)

The indicator doesn’t appear in your final video. It’s a TinyRec UI element drawn on top of your screen for you — the captured frames silently exclude it. Same for the menu bar icon and the 3-2-1 countdown overlay. Whatever you see in the editor preview is what your viewers see.
Stopping
Three ways to stop a take:
- Click Stop on the floating indicator
- Click the menu bar icon (red circle, top-right of the macOS menu bar) and choose Stop
- Use the keyboard shortcut — see Settings → Shortcuts
When you stop, TinyRec drops you straight into the editor with the take loaded. No “save as” prompt, no holding pen — your recording is the project.
What’s next
- Write a script with multiple scenes — when you want a planned, multi-take recording instead of one continuous shot.
- App overview — Home, Recorder, Editor — the three surfaces and how they connect.
- Privacy and data — what stays on your Mac (everything) and what doesn’t.
If your iPhone doesn’t appear in the picker, see iPhone not detected for the four-step checklist.