Timeline
The timeline is the editor's centre of gravity. Every cut, zoom, mask, annotation and audio tweak lives on it as a discrete segment you can move, resize, or delete.
The timeline is where every edit happens. It’s the row of segments at the bottom of the editor — your video sits on it, and every effect you add lives on its own track on top. Click a segment to select it; the right-side settings panel switches to that segment’s tab automatically. Drag the body of a segment to move it. Drag its edges to resize.
Most edits are non-destructive — pull a trim handle back out and the frames return. The underlying recording is never modified, only the layers on top of it.
Cut and trim

Trimming is dragging the edges of a video segment.
- Drag the right edge inward to cut off the end. Drag it back out to restore those frames.
- Drag the left edge inward to trim the start. Same restore behaviour.
- Split a clip by positioning the playhead and pressing the split shortcut (or right-clicking → Split). The segment becomes two — keep one, delete the other, or trim each independently.
- Cut silence — the Audio tab has a one-button silence detector that finds long quiet stretches and removes them in a single pass. You can review each cut before it commits.
- Reorder by dragging the body of a clip left or right. Other segments shift to make room.
- Delete with the Delete key on a selected segment, or the Trash icon in the settings panel.
Add a zoom segment
Drag across a region of the video segment on the timeline (or click Add Zoom in the Animation tab) to drop a new zoom segment into that range. The new segment defaults to Auto mode — TinyRec picks the focus from cursor activity. Switch to Manual in the Animation panel to pin the focus rectangle yourself.
Auto zoom segments are also generated for you automatically as soon as a recording opens. You typically don’t add manual ones — you tweak the existing auto pass. Full reference: Zoom.
Highlight or blur sensitive data
Click Add Mask in the toolbar (or right-click on the timeline → Add Mask). A new mask segment lands on the timeline and a draggable rectangle appears on the preview canvas.
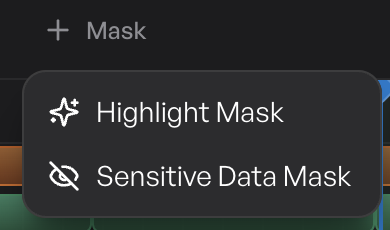
Two mask types:
- Blur / pixelate — for hiding passwords, names, that one tab you forgot to close. Drag the rectangle over what you want hidden, set the blur strength in the panel.
- Highlight — the inverse. Mask out everything else and spotlight the one area you’re talking about. Useful for callouts where the rest of the screen would be a distraction.
Mask segments behave like every other segment: drag the body to move, drag the edges to extend the duration. Move the rectangle on the preview to reposition. The blur / highlight follows wherever the rectangle is placed for the segment’s whole duration.
Annotations — text and image
Click Add Annotation in the toolbar. Pick the annotation type from the popup:
- Text — drop a text label anywhere on the canvas. Type, choose a font and colour, set the animation (fade in / slide in / pop). Useful for quick callouts or labels.
- Arrow / shape / highlight — geometric annotations that point at things on screen.
- Image — drag a PNG or JPG into the annotation area to drop it onto the canvas. Resize and reposition by dragging in the preview. Useful for logos, diagrams, or any reference image you want overlaid on the recording.
Every annotation gets its own segment on the timeline. The default duration is short enough to read; extend the segment by dragging its right edge if you want the annotation to linger longer. Each annotation can have its own enter and exit animation in the settings panel.

Annotations are rendered live in the preview, so you can position them at the exact moment they appear — scrub the playhead to the start of the annotation segment, then drag the annotation in the preview canvas. The position you set there is what the viewer sees.
Camera segments
The camera bubble lives on its own track too. Drop a Hide camera segment to fade the bubble out for a stretch where it’s in the way, or a Fullscreen camera segment to push the camera out from its corner to fill the entire canvas — useful for intros, outros, and reaction shots. Both behave like every other segment: drag the body to move, drag the edges to change the duration.
Full reference for shape, crop, position, and per-segment behaviour: Camera.
What’s next
- Zoom — auto-generated zoom segments and how to switch any one to manual focus.
- Audio editing — the audio segments on the timeline, plus the cut-silence button.
- Camera — the camera bubble lives on its own track too; resize, hide, or push it fullscreen on specific segments.