Grant permissions on first launch
Screen Recording, Accessibility, Camera, Microphone — what TinyRec asks for and why.
macOS gates each capture surface behind its own permission. TinyRec doesn’t get a single “record” toggle — it has to ask for screen access, cursor tracking, mic, and camera separately.
The first time you open the app, TinyRec walks you through this with a built-in wizard: each step shows a short autoplaying video of exactly what to do, and a Grant button in the bottom-right that does it for you. Total time: about 30 seconds.
Worried about privacy? Read Your data stays on your Mac — TinyRec runs 100% offline. None of these permissions ship data anywhere; they only let the app see things on your own machine.
Step 1 — Required: Screen Recording 🖥
This is the one that lets TinyRec see your screen. Without it the source picker shows nothing and you can’t record.
The wizard step plays a short video showing the toggle you’re about to enable, then click Grant in the bottom-right.
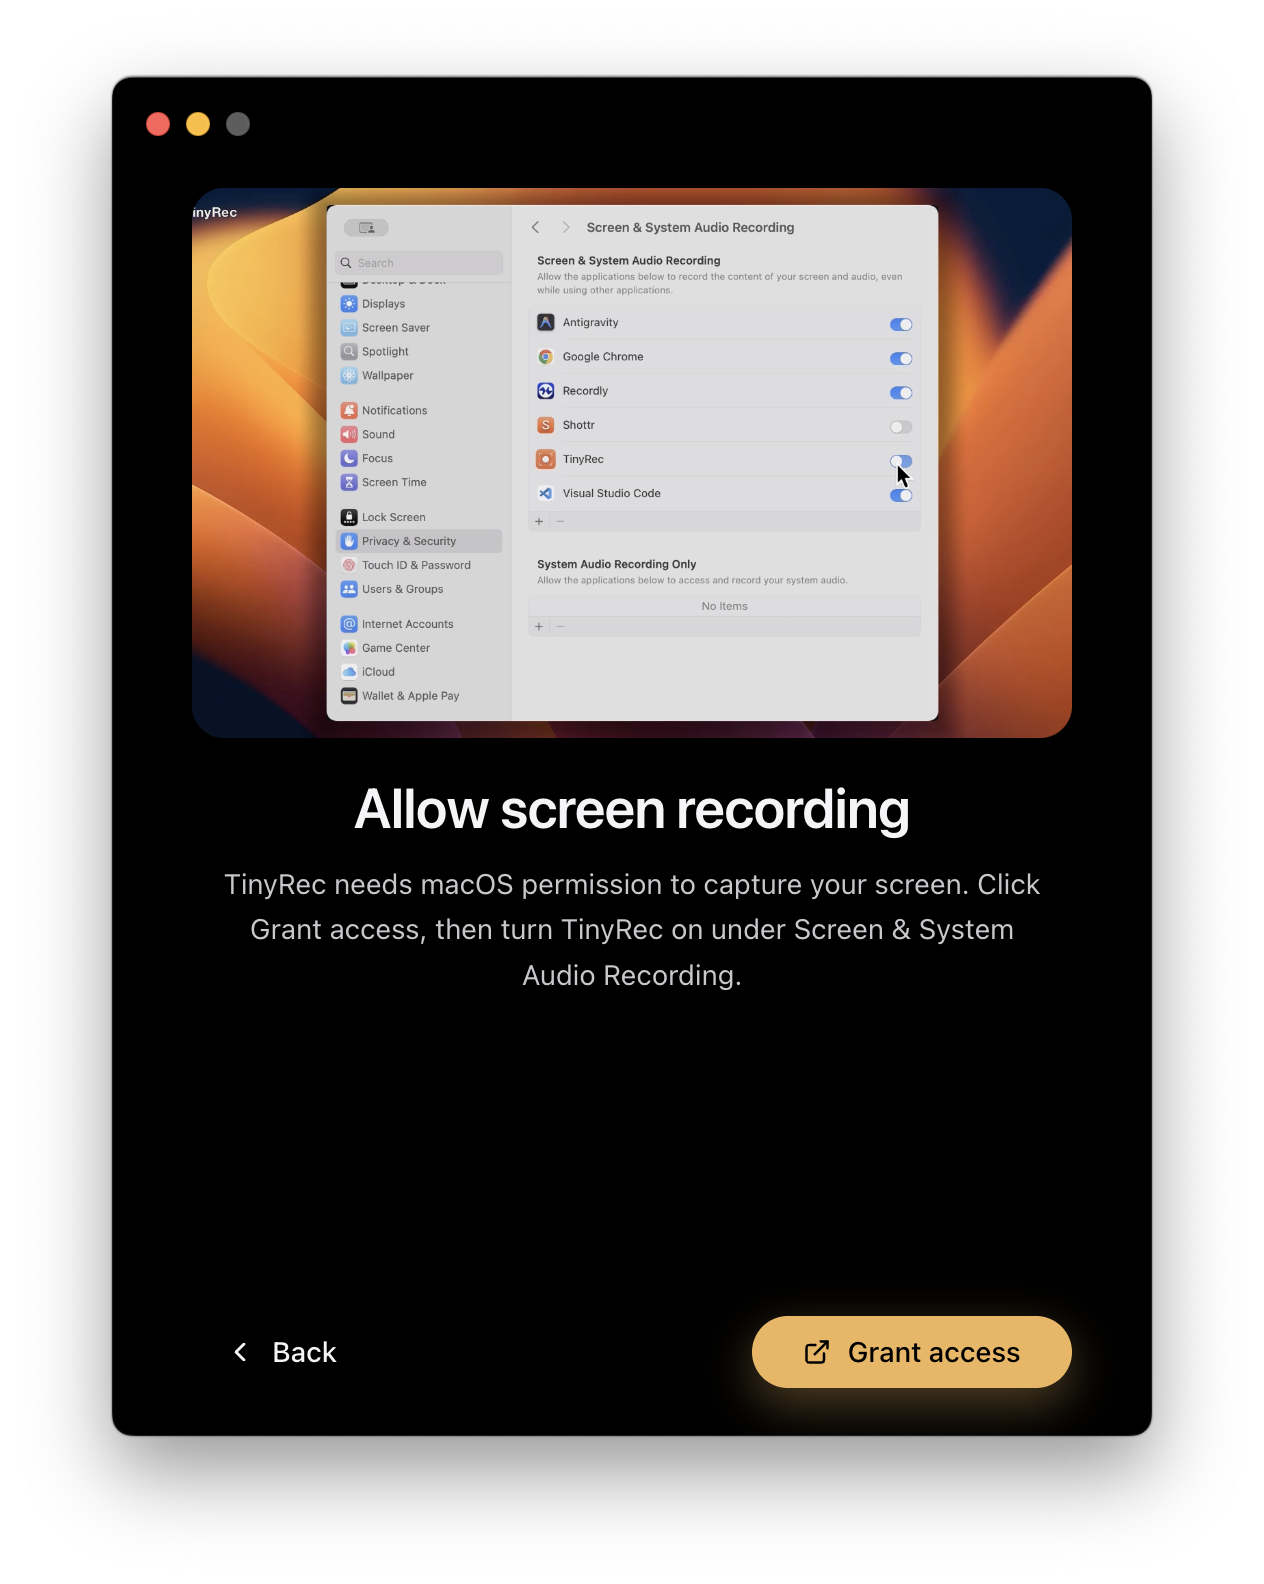
macOS pops up its own confirmation. Approve it, then TinyRec asks you to reload the app — Screen Recording only takes effect on a fresh launch. Click the reload button, the app restarts, and you’re dropped right back at the next step.
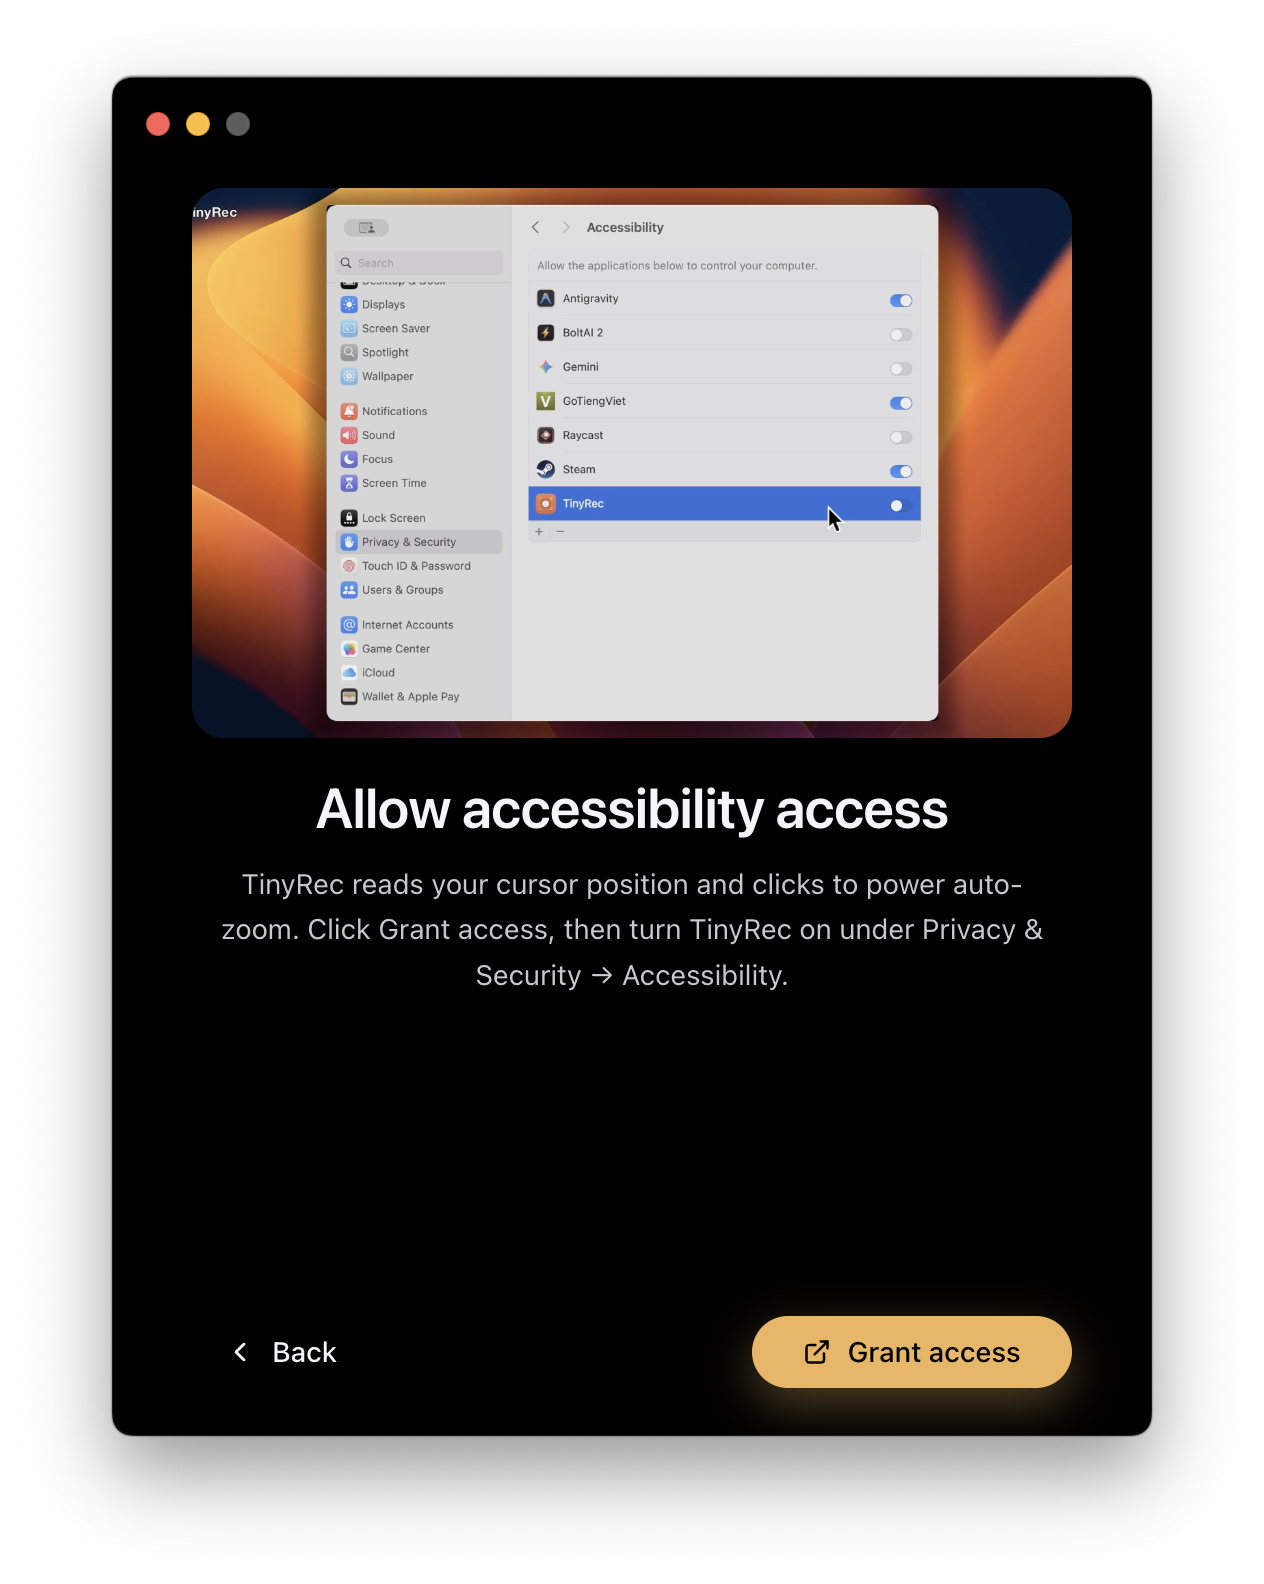
Step 2 — Required: Accessibility ♿️
TinyRec uses Accessibility to read the precise cursor position. This powers Auto Zoom (the editor zooms toward whatever your cursor was doing), click effects (the ripple and glow when you click), and smart focus tracking. Without it your recordings still capture, but the editor’s marquee features won’t work.
This step shows another short video, then a Grant button. Click it, approve macOS’s prompt, and you’re done — no reload required this time.
Step 3 — Optional: Camera + Microphone 🎤📷
These are only needed if you want their specific feature. Skip either one you don’t plan to use — you can always grant them later from inside the app.
Unlike the required permissions above, Camera and Microphone don’t open System Settings. Click Allow when each step’s Grant button is clicked, the standard macOS “TinyRec wants to use your microphone / camera” alert appears, and you tap Allow on that. That’s it — no detour to Settings, no app restart.

What if I miss a step or click Skip?
Nothing breaks. The wizard never blocks you from continuing — required permissions can be granted later from the home screen’s permission status row, and the optional ones can be flipped on the first time you try to use that feature.
If a recording silently has no audio or no camera feed, that’s almost always a missing permission — re-open the wizard from the home screen to fix it.
What’s next
You’re ready to record. The next guide takes you through your first take end-to-end.
Or, if you want the privacy story before you grant anything: