App overview — Home, Recorder, Editor
TinyRec has three main surfaces. Here's what each one does and how to move between them.
TinyRec is split into three places: the Home screen where your projects live, the Recording dashboard where you set up and capture takes, and the Editor where you trim, style, and export. Knowing which one you’re on (and how to get to the others) makes everything quicker.
The three surfaces, in one diagram
You always start at Home. You always end up at the Editor. The path between depends on whether you picked Quick recording or Write a script first.
Surface 1 — Home
The home screen is where every project lives. It opens by default when you launch TinyRec.

You’ll find:
- Two method cards at the top — pick Write a script first for multi-scene tutorials, or Quick recording for a one-shot capture.
- Recent projects below — every project you’ve worked on, newest first. Hover any row to see Rename and Delete buttons. Tick the checkbox to multi-select and bulk-delete.
- Click any project row to jump back into it where you left off.
When the Recent Projects list is empty, the message stays vertically centered — that’s a clue you have nothing to come back to and should pick a method card to start fresh.
Surface 2 — Recording dashboard
This is where you set up the take and hit record. Reaches it by clicking a method card on Home, or by clicking Record in the project step nav.
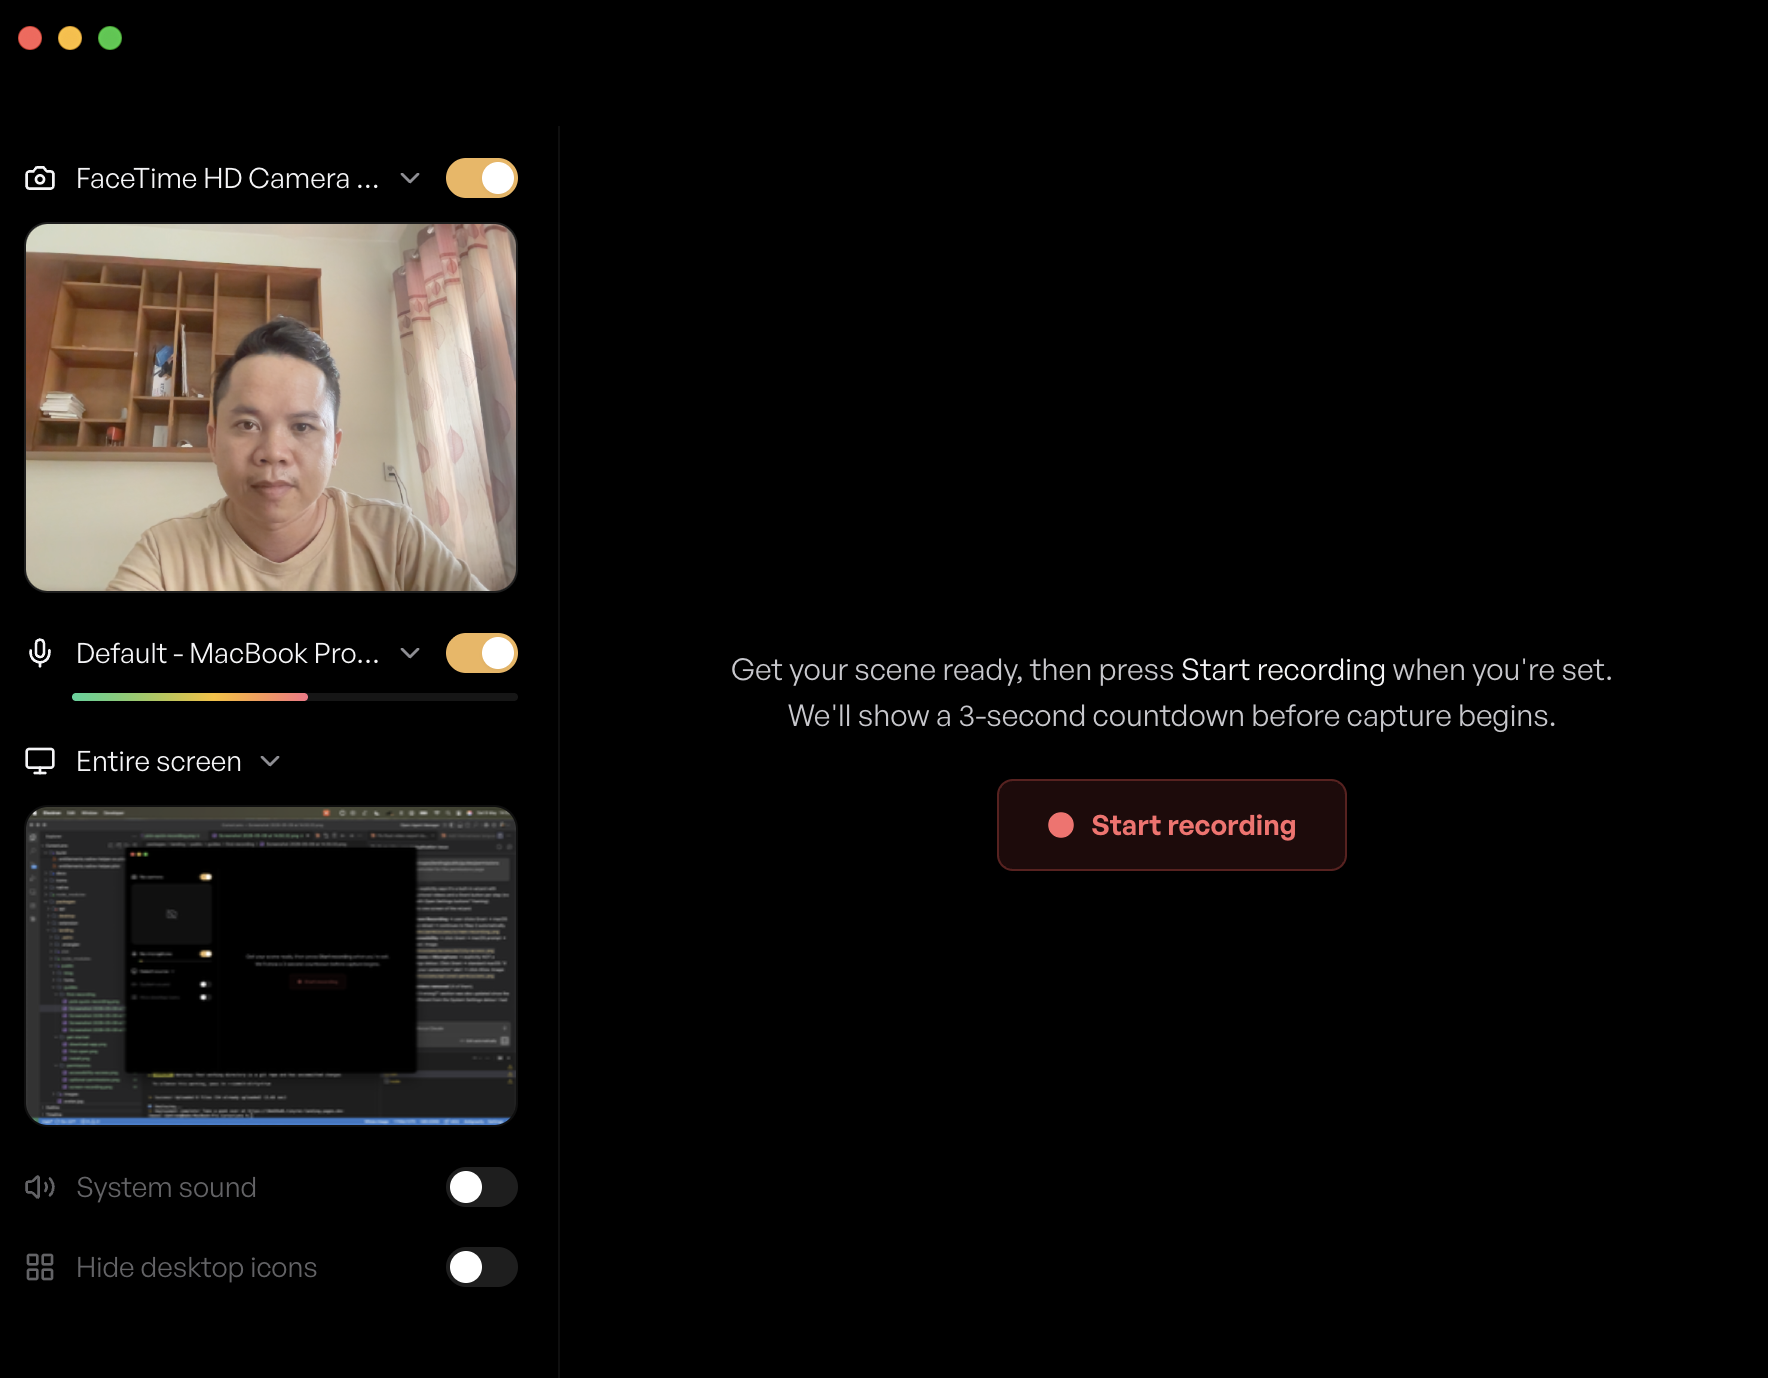
You’ll find:
- Device sidebar on the left — camera, mic, system sound on/off. Live mic level meter, live camera preview.
- Source picker — click the screen icon to pick what to capture (Display / Window / Region / iPhone).
- Scene grid in the middle — for script projects, one card per scene with a Record button. For quick projects, just a single big Start Recording button.
- Recording indicator — once you hit record, a floating window shows the elapsed timer, the current scene title, and a Stop button. It also displays the script text if your scene has one.
Quick recordings skip most of this — you get a single Start button and go straight to the editor when you stop.
Surface 3 — Editor
After you stop recording (or click Open Editor on the dashboard), you land here.
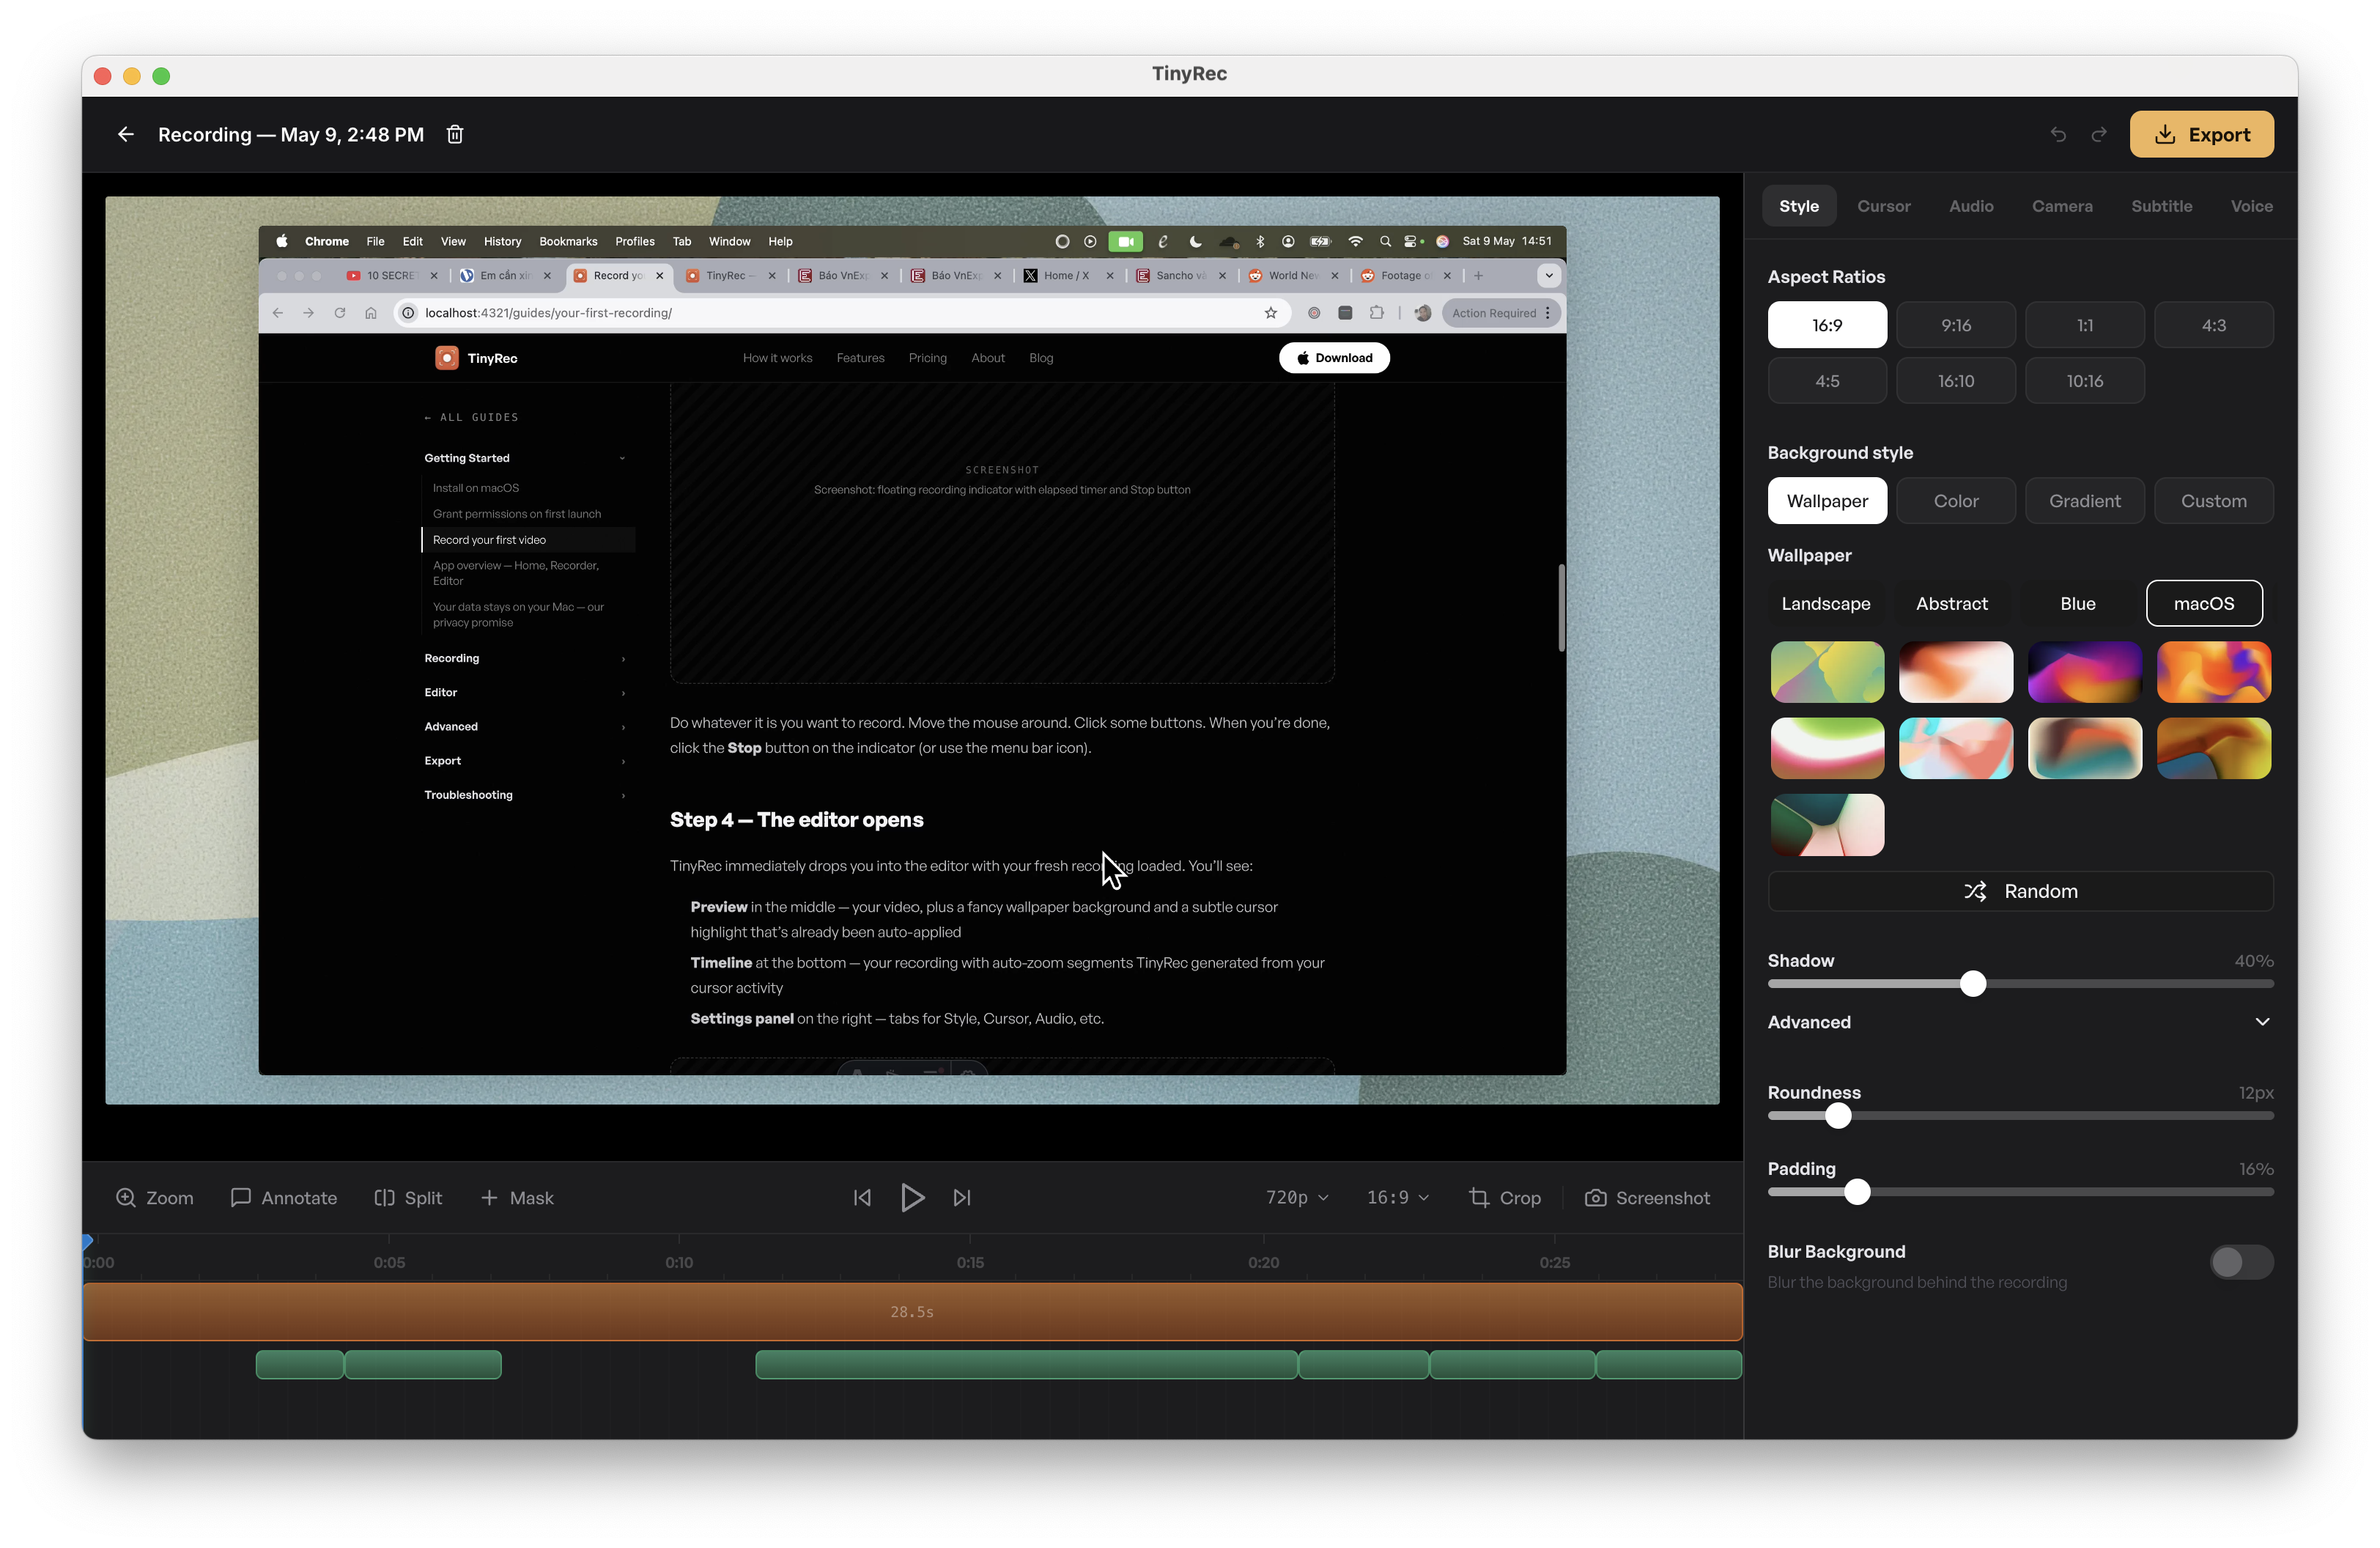
The editor has three big regions:
- Preview canvas in the middle — your video with effects applied live. Drag inside it to reposition zoom focus.
- Timeline at the bottom — every effect you’ve added (zooms, trims, masks, audio edits, subtitles, voice-overs) sits on its own row. Click a segment to select it; drag it to move; drag its edges to resize.
- Settings panel on the right — tabs for Style (background, padding, corner radius), Cursor, Audio, Camera, Subtitle, Voice, Animation, and Frame (for iPhone bezels). When you select a timeline segment, the panel auto-switches to its settings.
Moving between surfaces
The Script / Record / Edit nav at the top of every screen lets you jump between the three steps without going back to Home. It only shows up for script projects (the multi-scene flow) — quick recordings hide it because there’s no script to flip back to.
The back arrow in the top-left always returns to Home. Editor and Dashboard back are silent — your project auto-saves continuously, no “save before closing?” dialogs.
What’s next
You’ve seen the whole app. Pick whatever you want to learn next:
- Recording: Sources, audio, and camera reference · Multi-scene script flow
- Editor: Editor overview · Zoom · Style your video
- Export: Quality, format, codec — all in one place