Editor overview
A tour of the TinyRec editor — preview canvas, timeline, settings panel — and how the three regions work together.
The editor is where every recording becomes a finished video. You land here automatically when you stop a take, or you can click Edit in the step nav to come back. The whole surface is split into three regions, and each one feeds the others.
The three regions
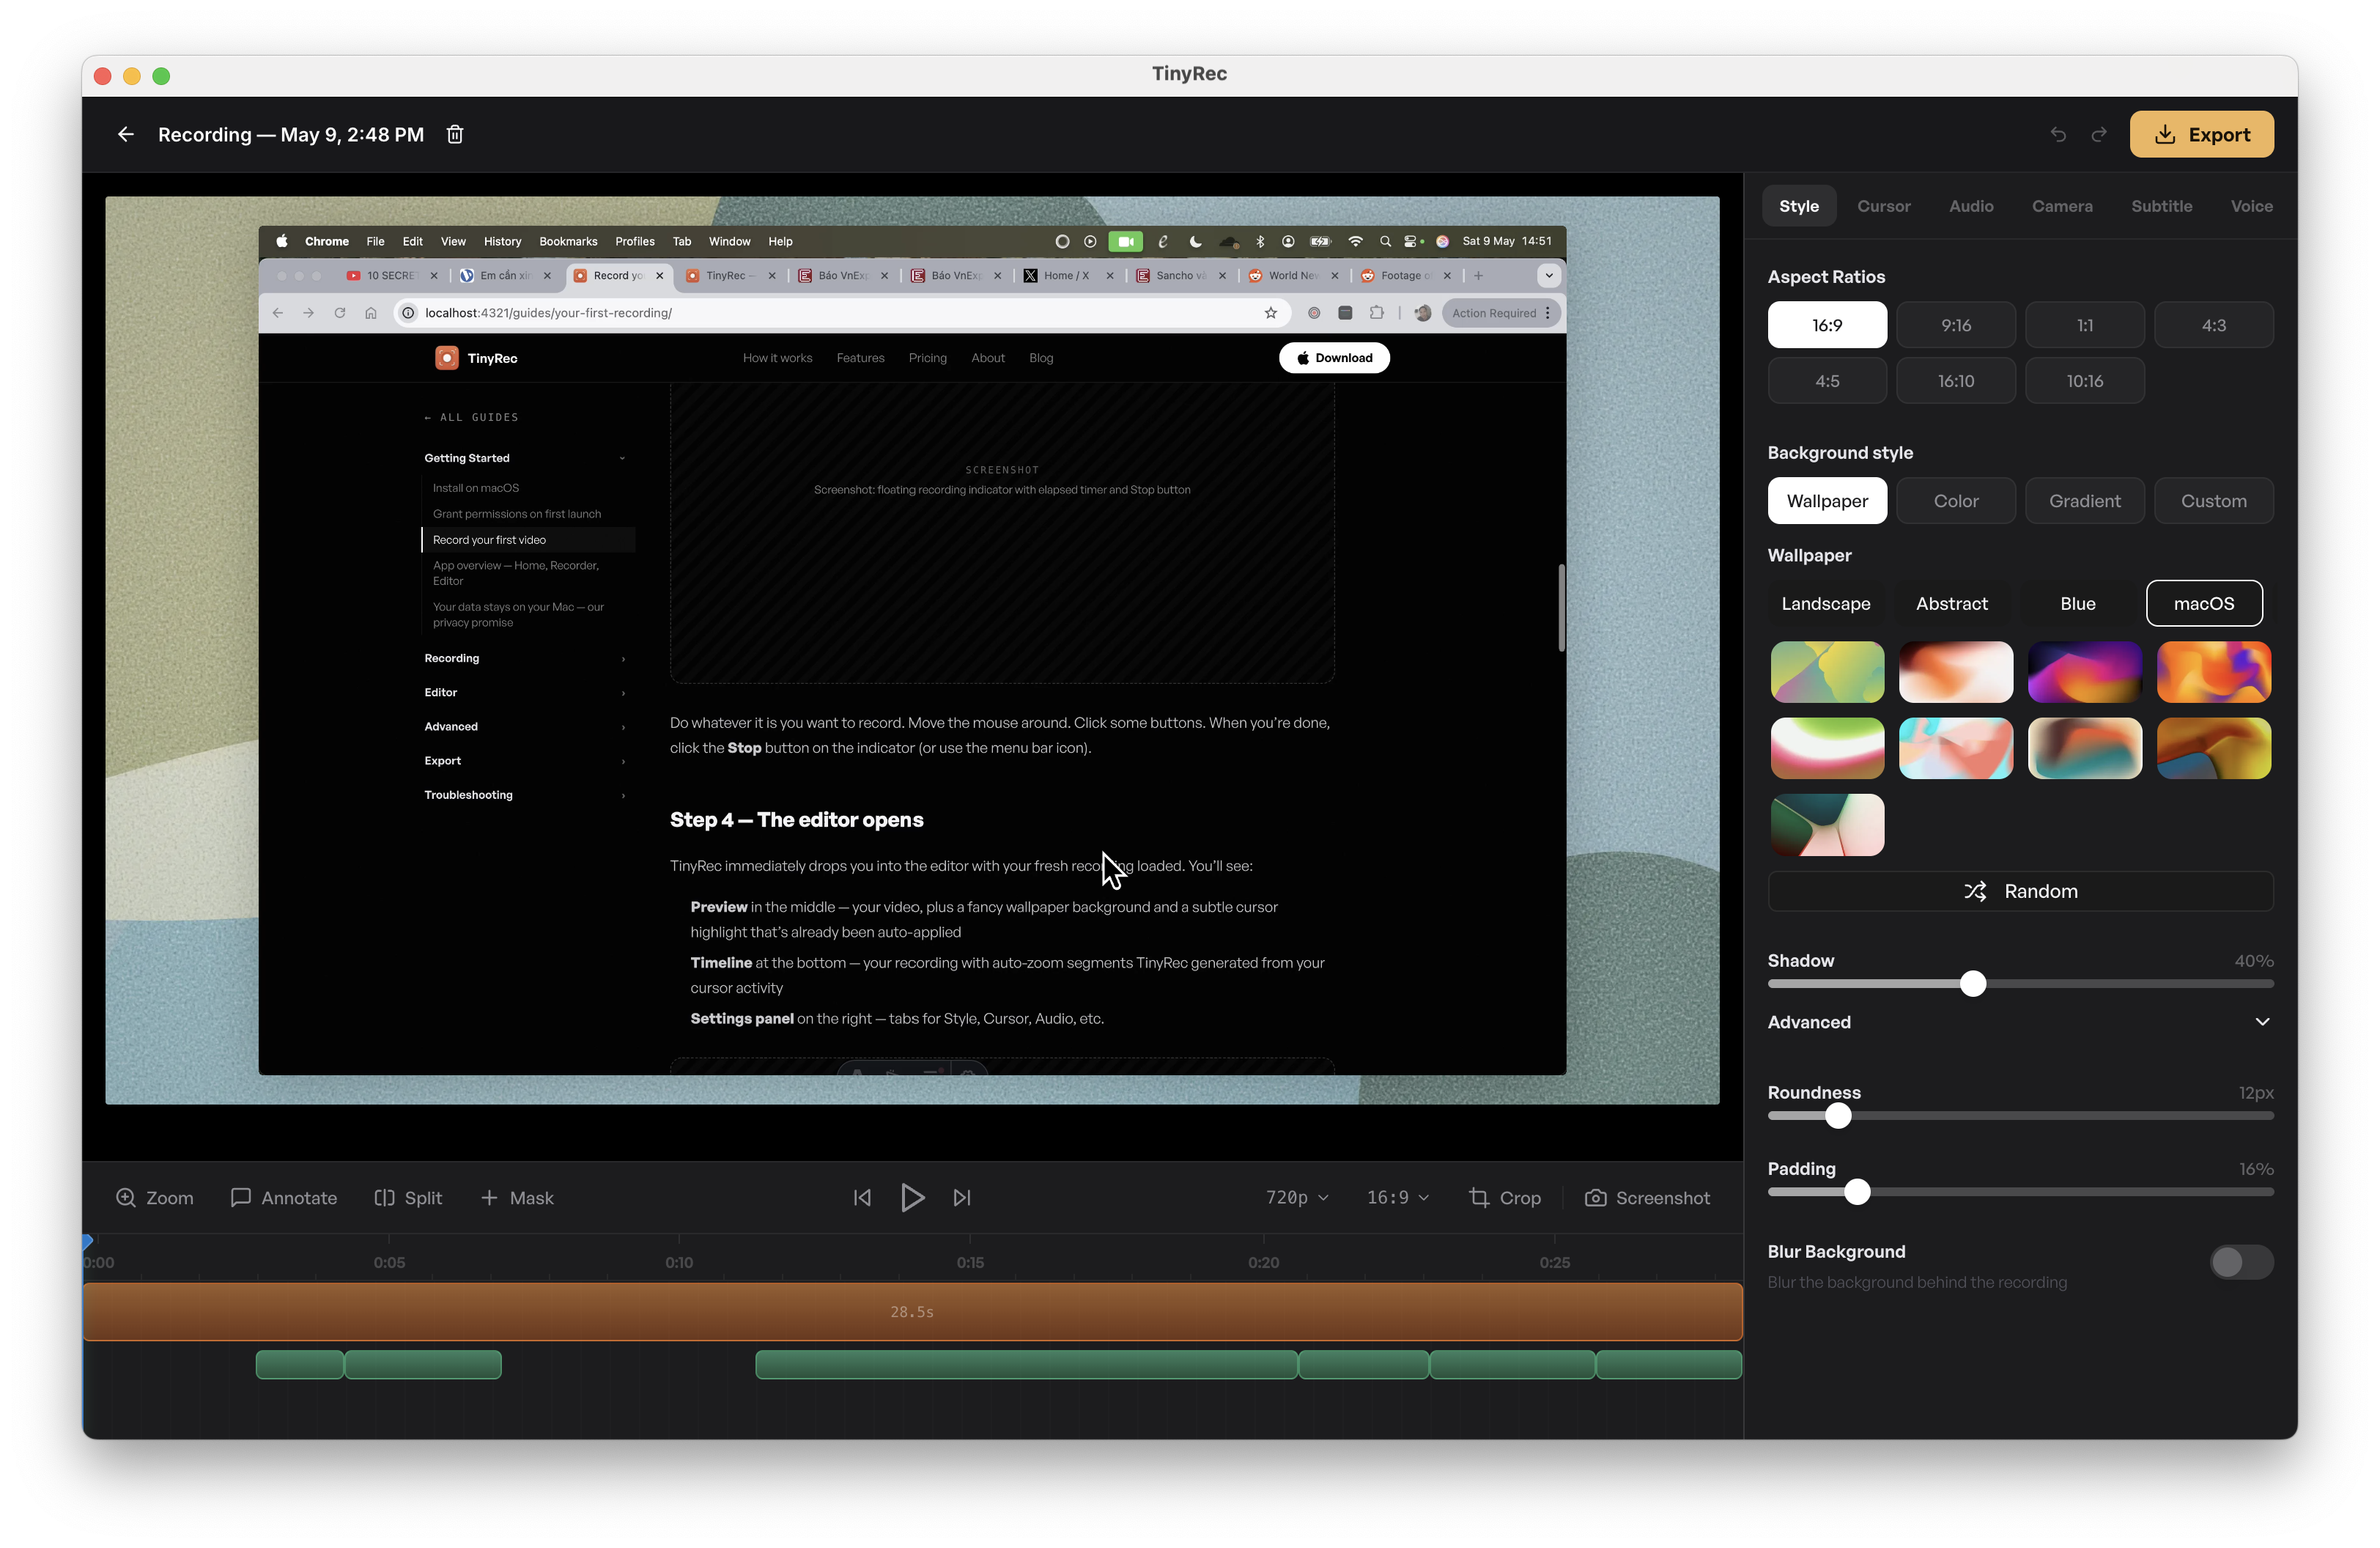
- Preview canvas in the middle — your video with every effect already applied. Hit space to play, click to scrub. Drag inside the preview to move zoom focus when you have a zoom segment selected.
- Timeline at the bottom — every effect lives on its own row: zooms, trims, masks, audio edits, subtitles, voice-overs, annotations. Click a segment to select it. Drag its body to move it in time. Drag its edges to resize.
- Settings panel on the right — context-aware. The visible tab matches whatever you’ve selected on the timeline. No selection? Use the tab strip up top to jump to any setting manually.
The settings panel — tab by tab
The right panel is where every knob lives. Eight tabs, each one focused on a single concern.
- Style — the look around your video. Wallpaper, background colour, padding, corner roundness, shadow, blur. See Style your video.
- Cursor — cursor highlight, click effects, click sounds.
- Audio — gain, normalisation, mute, fade in/out for the mic and system audio tracks. See Audio editing.
- Camera — camera bubble position, size, shape, hide/show on specific segments. The camera was recorded as a separate track, so changes here never need a re-take.
- Subtitle — generate captions with local Whisper, style them, and reposition. See Subtitles.
- Voice — type a script, get a natural AI voice track timed to your scene. See Voiceover.
- Animation — manage zoom segments and other animated effects. See Zoom.
- Frame — wrap iPhone recordings in a real device bezel. See Wrap your video in an iPhone bezel.
When you select a segment on the timeline, the panel switches to that segment’s tab automatically. Pick a zoom and you’re in Animation. Pick a subtitle and you’re in Subtitle. No tab-hunting.
How edits flow
Most edits are two clicks: select a segment, change a setting in the panel. The preview updates live — no “apply” button.
A few specifics:
- Trimming — drag either edge of a video segment on the timeline. The cut is non-destructive; drag the edge back out and the frames return.
- Reordering — drag the body of a segment left or right.
- Speed changes — select a segment, switch to Animation, set the speed. The segment’s width on the timeline updates to reflect the new duration.
- Cut silence — one button under the Audio tab. TinyRec finds long quiet stretches and removes them in one pass; you can review each cut before committing.
The step nav (script projects)
Script projects show a Script · Record · Edit strip at the top of every screen. Click any step to jump back — your project state is preserved going both ways. Quick recordings hide this strip because there’s no script to flip back to.
Auto-save
The editor saves continuously. There’s no Save button and no “save before closing?” dialog — close the window or jump back to Home and your project is exactly where you left it. The home screen’s Recent Projects list reflects the auto-saved state.
Export
The Export button sits in the top-right of the editor. Pick a folder, give the file a name, choose your quality and aspect ratio, and the render starts. A 30-second 1080p clip exports in a few seconds; longer clips scale linearly.
See Export for the full list of options.
What’s next
You’ve seen the layout. Now dig into the parts that matter for your video:
- Timeline and trimming — drag, cut, reorder, change speed.
- Zoom — auto-generated zoom segments, plus manual focus when you need to pin one.
- Style your video — wallpaper, padding, roundness, shadow, blur.