Camera
Show or hide the camera bubble, change its size, position, shape and crop, and push it to fullscreen on specific segments — all without re-recording.
If you toggled the camera on while recording, TinyRec captured it as a separate track — not baked into the screen recording. That means everything about how the camera looks is editable after the fact. Resize it, move it, change its shape, hide it on some segments, push it fullscreen on others. None of these need a re-record.
Open the Camera tab in the right-side settings panel to find every control.
Toggles, flip, shape
The top of the Camera tab clusters the on/off-style controls together: show the camera or hide it, mirror it horizontally, choose its shape, and decide whether it shrinks during zoom segments.
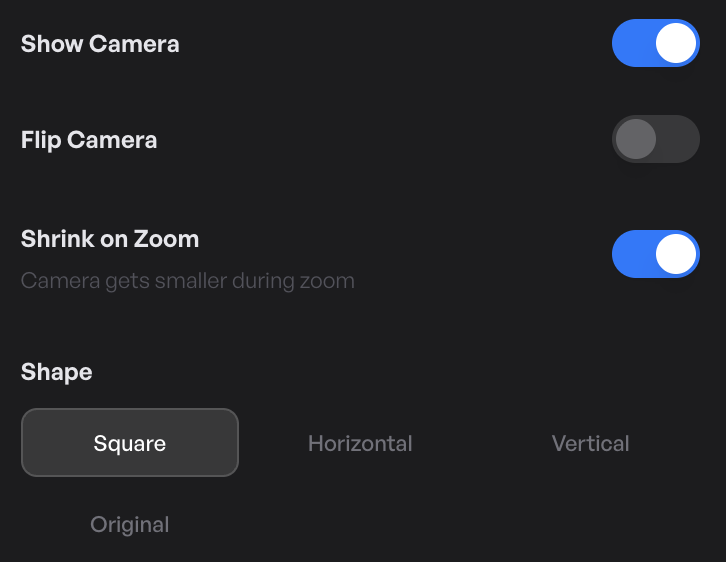
- Show / hide — project-wide toggle. Flip it off to ship a no-face-cam version of the same recording without losing the captured track; flip it back on later and your bubble is exactly where it was. For per-segment hiding (e.g. just for one stretch of the take), drop a Hide camera segment on the timeline — the camera fades out at the segment’s start and fades back in at the end.
- Flip horizontally — mirror the camera so the image matches what you see in a mirror rather than what the lens captures. Useful when you have text on screen behind you (a t-shirt logo, a whiteboard) that would otherwise read backwards.
- Shape — circle, rounded square, or full rectangle. Brand videos often go all the way to a circle for the corner bubble; product demos work well with rounded squares. Sharp rectangles read as raw / unstyled.
- Shrink camera when zooming (default on) — the camera shrinks slightly whenever a zoom segment is active. The thinking: when the screen is zoomed in, the cursor or content is the focus — a full-size camera bubble would compete for attention. Turn it off for talking-head segments where the camera is the focus, or branded videos where the bubble size shouldn’t change.
Size, roundness, and position
Three sliders below the toggles control the bubble’s geometry on the canvas.

- Size — 5%–50% of the canvas. Default is around 22%; bump it up for talking-heavy videos, down for screen-heavy ones.
- Corner roundness — 0 (sharp rectangle) to 50 (full circle on a square camera, pill on landscape). A medium radius (12–24) reads as polished without being cute.
- Position — a 9-cell anchor picker for the four corners, the four edge centres, and dead-centre. You can also drag the camera bubble in the preview canvas to move it freehand; the change is live and the picker snaps to the nearest cell.
The preview canvas updates in real time as you drag any of these. Whichever you change updates the others — you can use whichever is faster for the moment.
Crop the camera
The crop control on the Camera tab lets you reframe the captured webcam feed without touching the bubble’s position on the canvas. Useful when the camera caught too much room around your head, or when you want a tight portrait crop instead of a full webcam frame.
Drag the crop rectangle inside the cropper to focus the camera on just your face. The crop applies to every frame of the camera track — it’s a one-time setup, not a per-segment thing.
Fullscreen camera segments
Sometimes the camera should be the video — an intro where you say hi to the viewer face-to-face, an outro where you wrap up looking at the camera, a punchy reaction shot that calls for the screen recording to fade away.
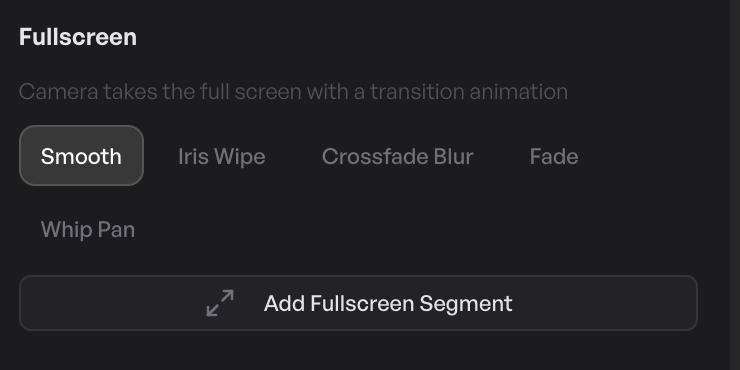
Drop a Fullscreen camera segment on the timeline at the spot where you want it. The camera animates from its corner bubble out to fill the entire canvas, holds for the duration of the segment, and animates back to the corner when the segment ends.
What you can change per fullscreen segment:
- Animation style — how the camera transitions in and out of fullscreen. Smooth zoom is the default; alternatives include iris wipe, crossfade blur, fade, and whip-pan. Pick the one that matches the energy of the moment — smooth for product demos, whip-pan for high-energy intros.
- Duration — drag the segment’s edges to control how long the camera holds full-frame.
- Background — what fills the canvas behind the camera while it’s expanded. Defaults to the project’s wallpaper; can be a solid colour or blur of the recording underneath.
Mix as many fullscreen segments as you want — intro, outro, mid-roll reaction, all on the same project.
What’s next
- Recording reference — sources, audio, camera — the recording-time camera setup (which device, the live preview, mic + system audio).
- Style your video — the wallpaper that fills the frame around the camera bubble.
- Timeline — adding hide-camera and fullscreen-camera segments on the timeline.